iOS and Android devices (phones and tablets)
Microphone levels on iOS and Android devices, such as phones and tablets, are set automatically and should work well in video calls. You cannot set the microphone (input) levels for these devices but you can take steps to ensure you will be heard clearly:
- Make sure you are speaking close to the microphone
- Ensure you are in as quiet a location as possible, so background noise does not interfere with the call
- Use headphones or earphones, if possible, for better quality sound and a mic that is close to your mouth
- Speak clearly and not too quietly, to ensure other participants in the call can here you
- Do not cover the microphone (at the bottom of your phone) with your hand as this can cause audio issues such as muffled sound and echo.
- Do not move your phone around too much during the consultation, unless you are asked to point your camera at a specific location.
Laptops and desktop computers
The microphone level set for your computer will determine your mic level during Video Call consultations. Usually you won't need to adjust this and participants in the call will be able to hear you clearly. If, however, your mic level is too low, this may cause issues during the call.
Please note: This issue will be picked up as part of the Connection Check for callers when they use the clinic link to access the waiting area for their consultation.
Please see below for information regarding how to adjust you microphone level:
MacOS devices
To adjust the microphone volume on your Mac laptop or desktop:
| Click on the Apple icon at top right of your screen and Click on System Settings. | 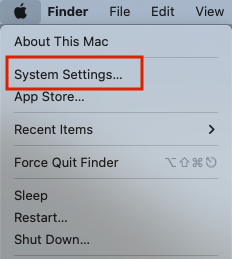 |
|
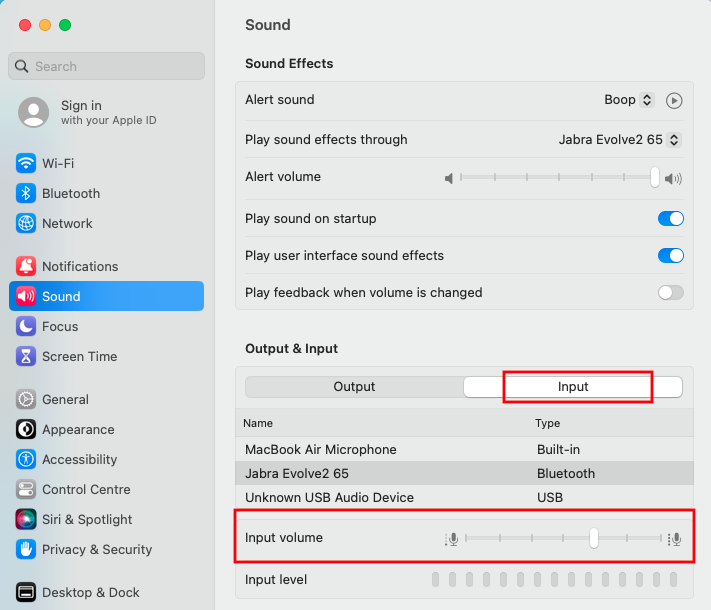
In System Settings, click on Sound.
Scroll down to Output and Input
|
 |
Windows 10 devices
There are a couple of ways to adjust the microphone level for your Windows 10 machine.
- You can increase microphone volume from the Settings app:
| Open the Start menu and choose Settings. | 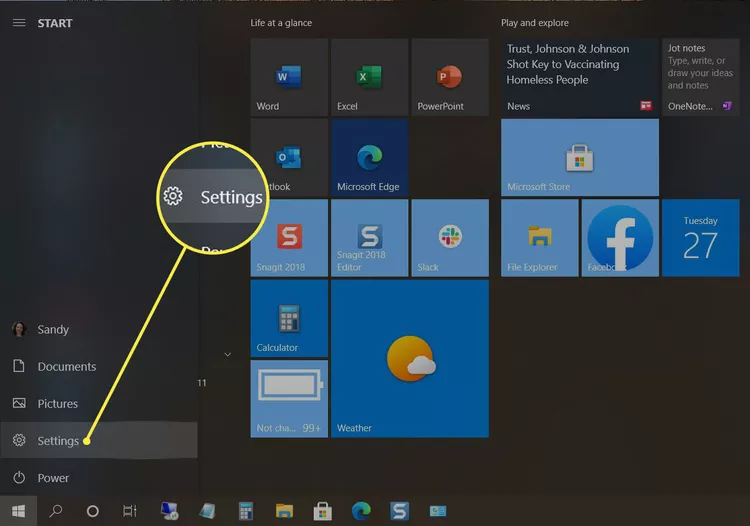 |
| Select System | :max_bytes(150000):strip_icc():format(webp)/002-how-to-increase-mic-volume-on-windows-10-ed946a47ef9f4cd393ed53169c11f39d.jpg) |
| Choose Sound on the left side. | 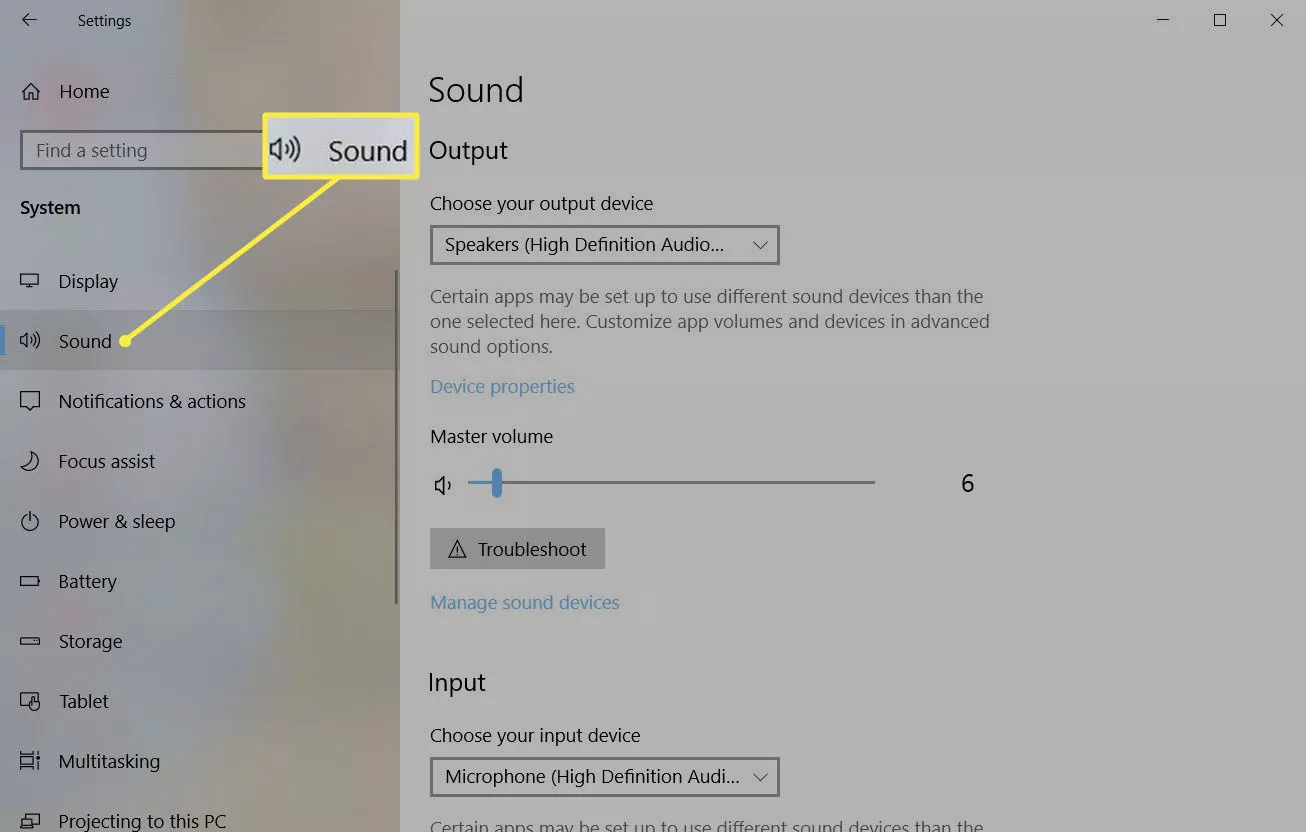 |
| From the Input section, pick a microphone in the drop-down list if you have more than one. | :max_bytes(150000):strip_icc():format(webp)/004-how-to-increase-mic-volume-on-windows-10-da4f76f831bb45a09aab2e47ca38d2b2.jpg) |
|
Select Device properties.
If you have a headset that includes a mic, the option is called Device properties and test microphone. |
:max_bytes(150000):strip_icc():format(webp)/005-how-to-increase-mic-volume-on-windows-10-701e12b23fc0471ebd53af6b92dc4b5c.jpg) |
| Use the Volume slider to increase the microphone volume. | :max_bytes(150000):strip_icc():format(webp)/006-how-to-increase-mic-volume-on-windows-10-de324b20e45545058e781a141f82c41f.jpg) |
2. You can use the Control Panel to adjust your microphone level:
| 1. Select the Start button and type Control Panel, then Select Control Panel from the list. | :max_bytes(150000):strip_icc():format(webp)/002_2625782-5ba3ffcb4cedfd00250de90f.jpg) |
| 2. Click on Hardware and Sound | :max_bytes(150000):strip_icc():format(webp)/007-how-to-increase-mic-volume-on-windows-10-ba626f25de2449c7a50114782b26f892.jpg) |
| 3. Select Sound | :max_bytes(150000):strip_icc():format(webp)/008-how-to-increase-mic-volume-on-windows-10-4b155398d6284c04983825822f8d33fb.jpg) |
| 4. Open the Recording tab | :max_bytes(150000):strip_icc():format(webp)/009-how-to-increase-mic-volume-on-windows-10-bb4163820d444f95871b4854a4ee55cb.jpg) |
| 5. Right-click the Microphone you want to adjust the volume for and choose Properties. | :max_bytes(150000):strip_icc():format(webp)/010-how-to-increase-mic-volume-on-windows-10-5e571ac3962e4fdfb33d887fb334b4e0.jpg) |
|
6. Open the Levels tab and use the slider to change the volume or enter a higher number in the text box to increase it.
Click OK to apply the volume change. |
:max_bytes(150000):strip_icc():format(webp)/011-how-to-increase-mic-volume-on-windows-10-33e51616abeb4116966a1e530f2f3874.jpg) |
Windows 11 devices
There are a couple of ways to adjust the microphone level for your Windows 11 machine.
- You can use the Control Panel to adjust your microphone level:
|
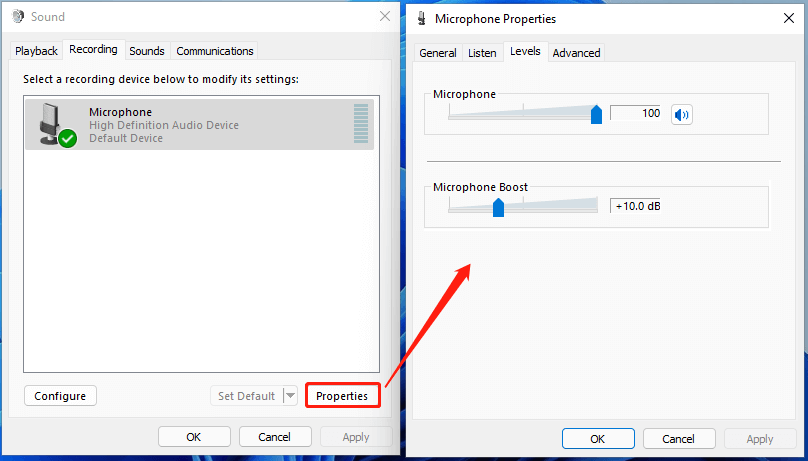
1. Navigate to Control Panel > All Control Panel Items > Sound.
2. In the pop-up, go to the Recording tab
3. In the Recording tab, click on the Microphone option and select the Properties button.
4. Select Levels and drag the Microphone volume bar from left to right to increase its volume. 5 if required, you can boost the microphone level by dragging the Microphone Boost bar toward the right. 6. Click OK to save and apply the changes. |
 |
2. You can increase microphone volume from the Settings app:
| 1. Open the Start button and select Settings under the Pinned section. | 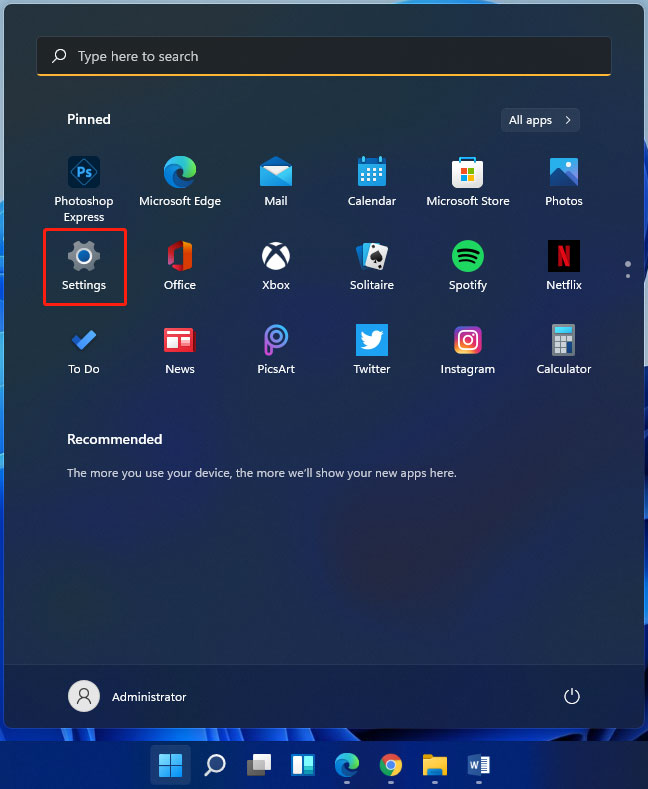 |
| 2. Click on Sound. | 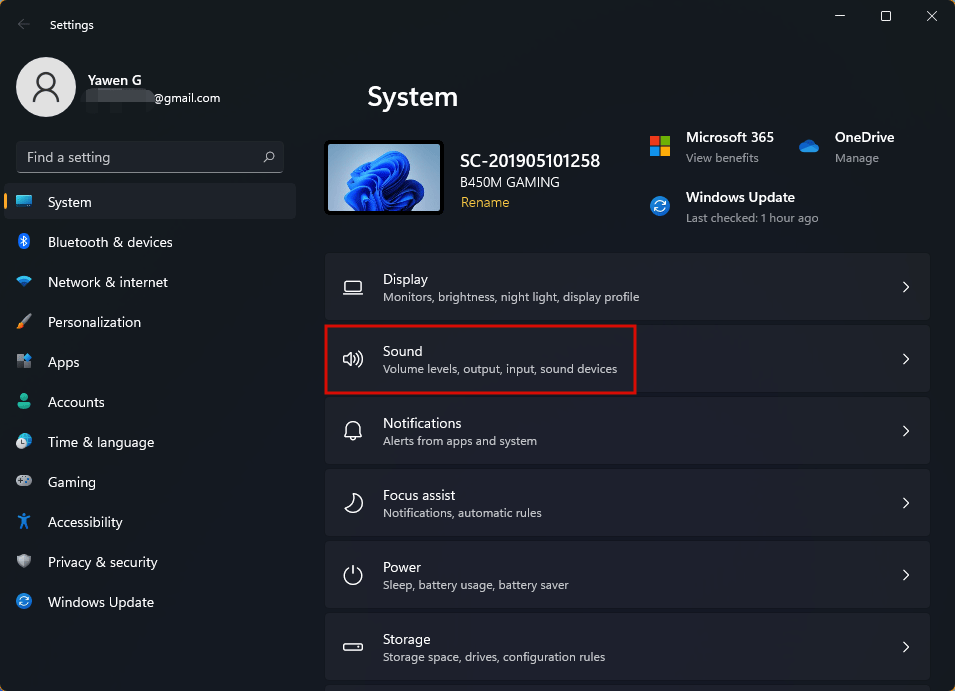 |
|
3. Scroll down to the Input section and select your desired Microphone. If you only have one microphone available, that will show as the only option.
|
 |
|
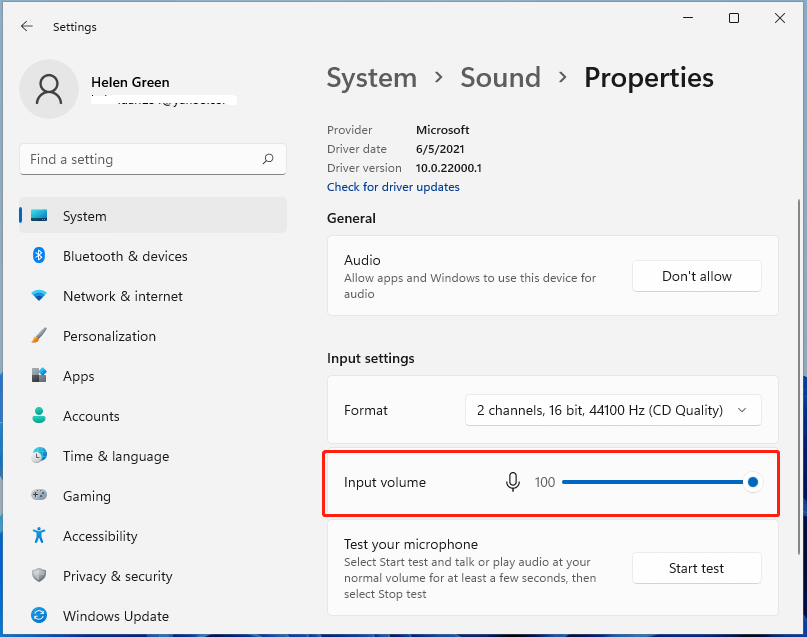
4. In the Properties page, scroll down to Input settings and adjust the input (mic) volume slider.
Click the Start test button to test your changes, if required. |
 |