Compatible medical devices such as general examination cameras, scopes, pulse oximeters, vision glasses etc are available though third party companies, independent from Healthdirect. These medical devices can be connected to your computer via USB or Bluetooth and used to enhance your Video Call diagnostic capabilities. Please note that Healthdirect does not provide these devices, your organisation will need to organise these independently if you wish to use them in your Video Call consultations.
Realtime remote patient monitoring
For information regarding patient monitoring devices that can be connected to a healthdirect Video Call please click here. This page has a list of tested devices, as well as information and quick reference guides regarding the process of connecting them into a call so the doctor can view the reading live.
Enriching the telehealth consultation experience
A health service provider with a patient in a clinical location, for example a GP practice, Aged Care Home or Urgent Care Centre (UCC), can share a Visionflex camera (scope, probe or Video glasses field of view) into a Video Call with a remote specialist, for examination and diagnosis.
The categories below show the types of devices compatible with healthdirect Video Call - this is not an exhaustive list but these products have been tested and shown to work with Video Call. There may be other products available.
Examination cameras and scopes
Enriching the telehealth consultation experience
A health service provider with a patient in a clinical location, for example a GP practice, Aged Care Home or Urgent Care Centre (UCC), can share a camera (scope, probe or Video glasses field of view) into a Video Call with a remote specialist, for examination and diagnosis.
|
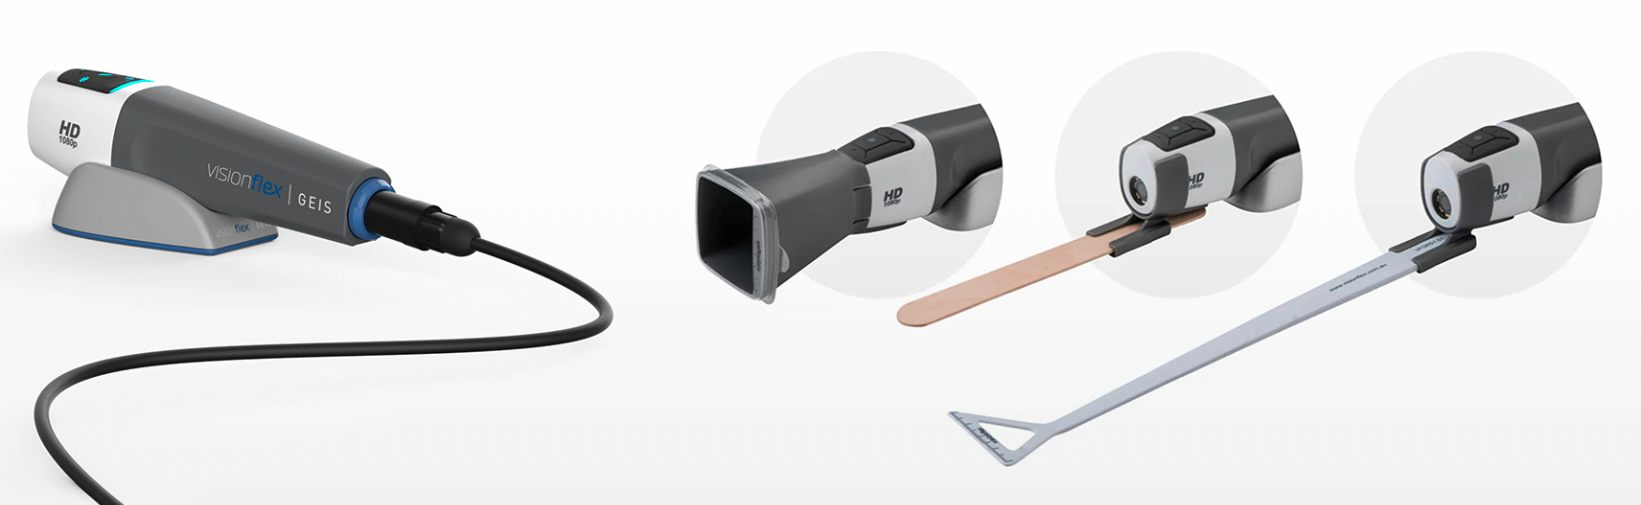
Visionflex General Examination Camera HD (GEIS) This is a hand-held telehealth consultation camera that can capture medical grade quality images and video in full HD 1080p resolution.
It enables the health service provider to perform a wide range of medical examinations, including skin, throat, dental and eye examinations.
This camera comes with a range of accessories to assist with these examinations. Some of these accessories are shown in the image to the right. |
 |
|
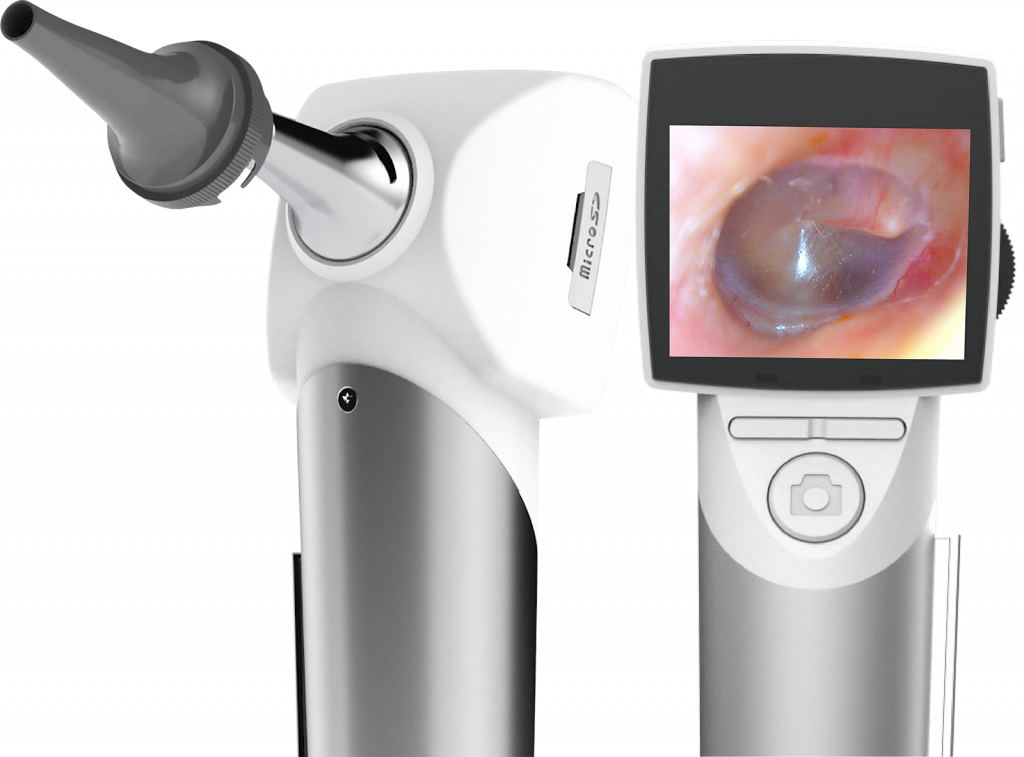
Visionflex Video USB Otoscope HD The video otoscope is optimised for inspection of the auricle, the external auditory canal and the eardrum. Precision optics, high-intensity LED illumination and professional-grade camera electronics support an accurate diagnosis. |
 |
|
Visionflex Dental Intraoral Camera HD C-U2 This intraoral dental camera provides high definition details and an innovative design for maximum comfort when examining the mouth and teeth.
|
 |
|
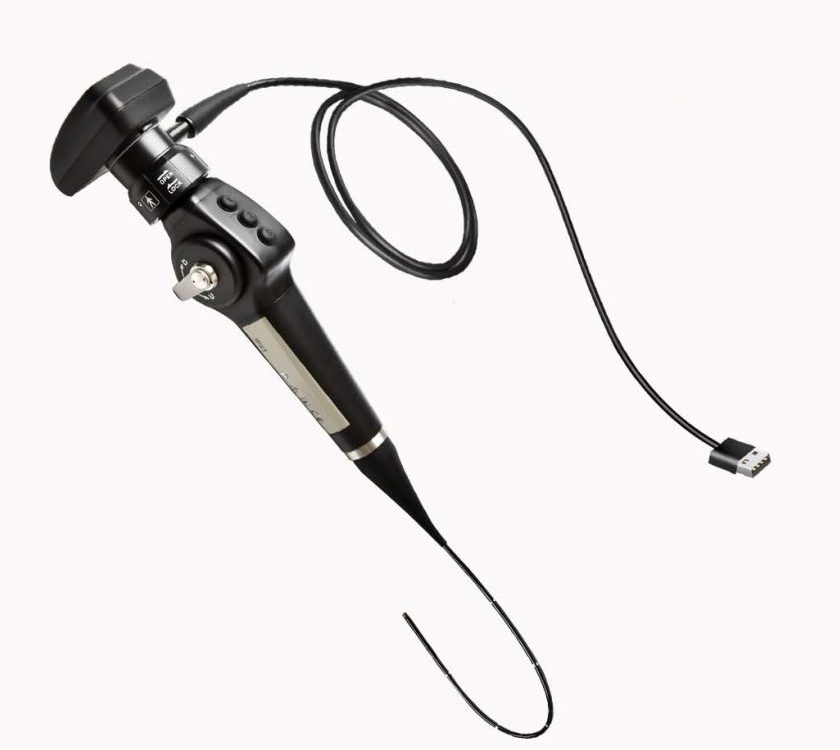
Visionflex Flexible Video Rhino Laryngoscope This high-definition flexible video rhino laryngoscope can be used for visual examination of the upper respiratory tract structures, including the nasal tract, nasopharynx, oropharynx and larynx.
|
 |
Vision glasses
Vision glasses with built-in high definition cameras allow the wearer in a Video Call to live stream a video feed of what they are seeing into the call. This 'see what I see' technology allows a clinician onsite with a patient to look at the area of concern while wearing the glasses in a call with a remote specialist, for example. The remote specialist can then review the issue and make a diagnosis.
|
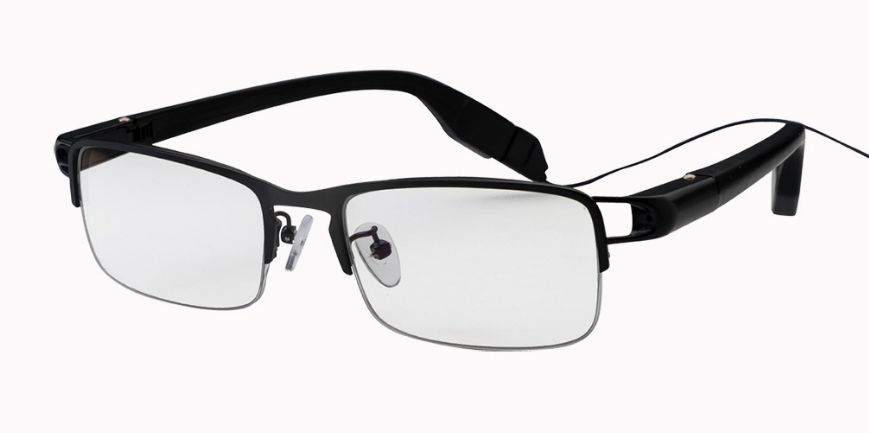
Visionflex Video Examination Glasses HD These video glasses with built-in high definition cameras allow the wearer in a Video Call to live stream a video of what they are seeing. Paramedics or nurses, for example, can stream their field of view directly to a doctor or specialist in another location, to collaborate and receive live expert medical feedback while caring for a patient. The video glasses have a long USB lead to ensure that the wearer can move around as required for the examination.
|
 |
|
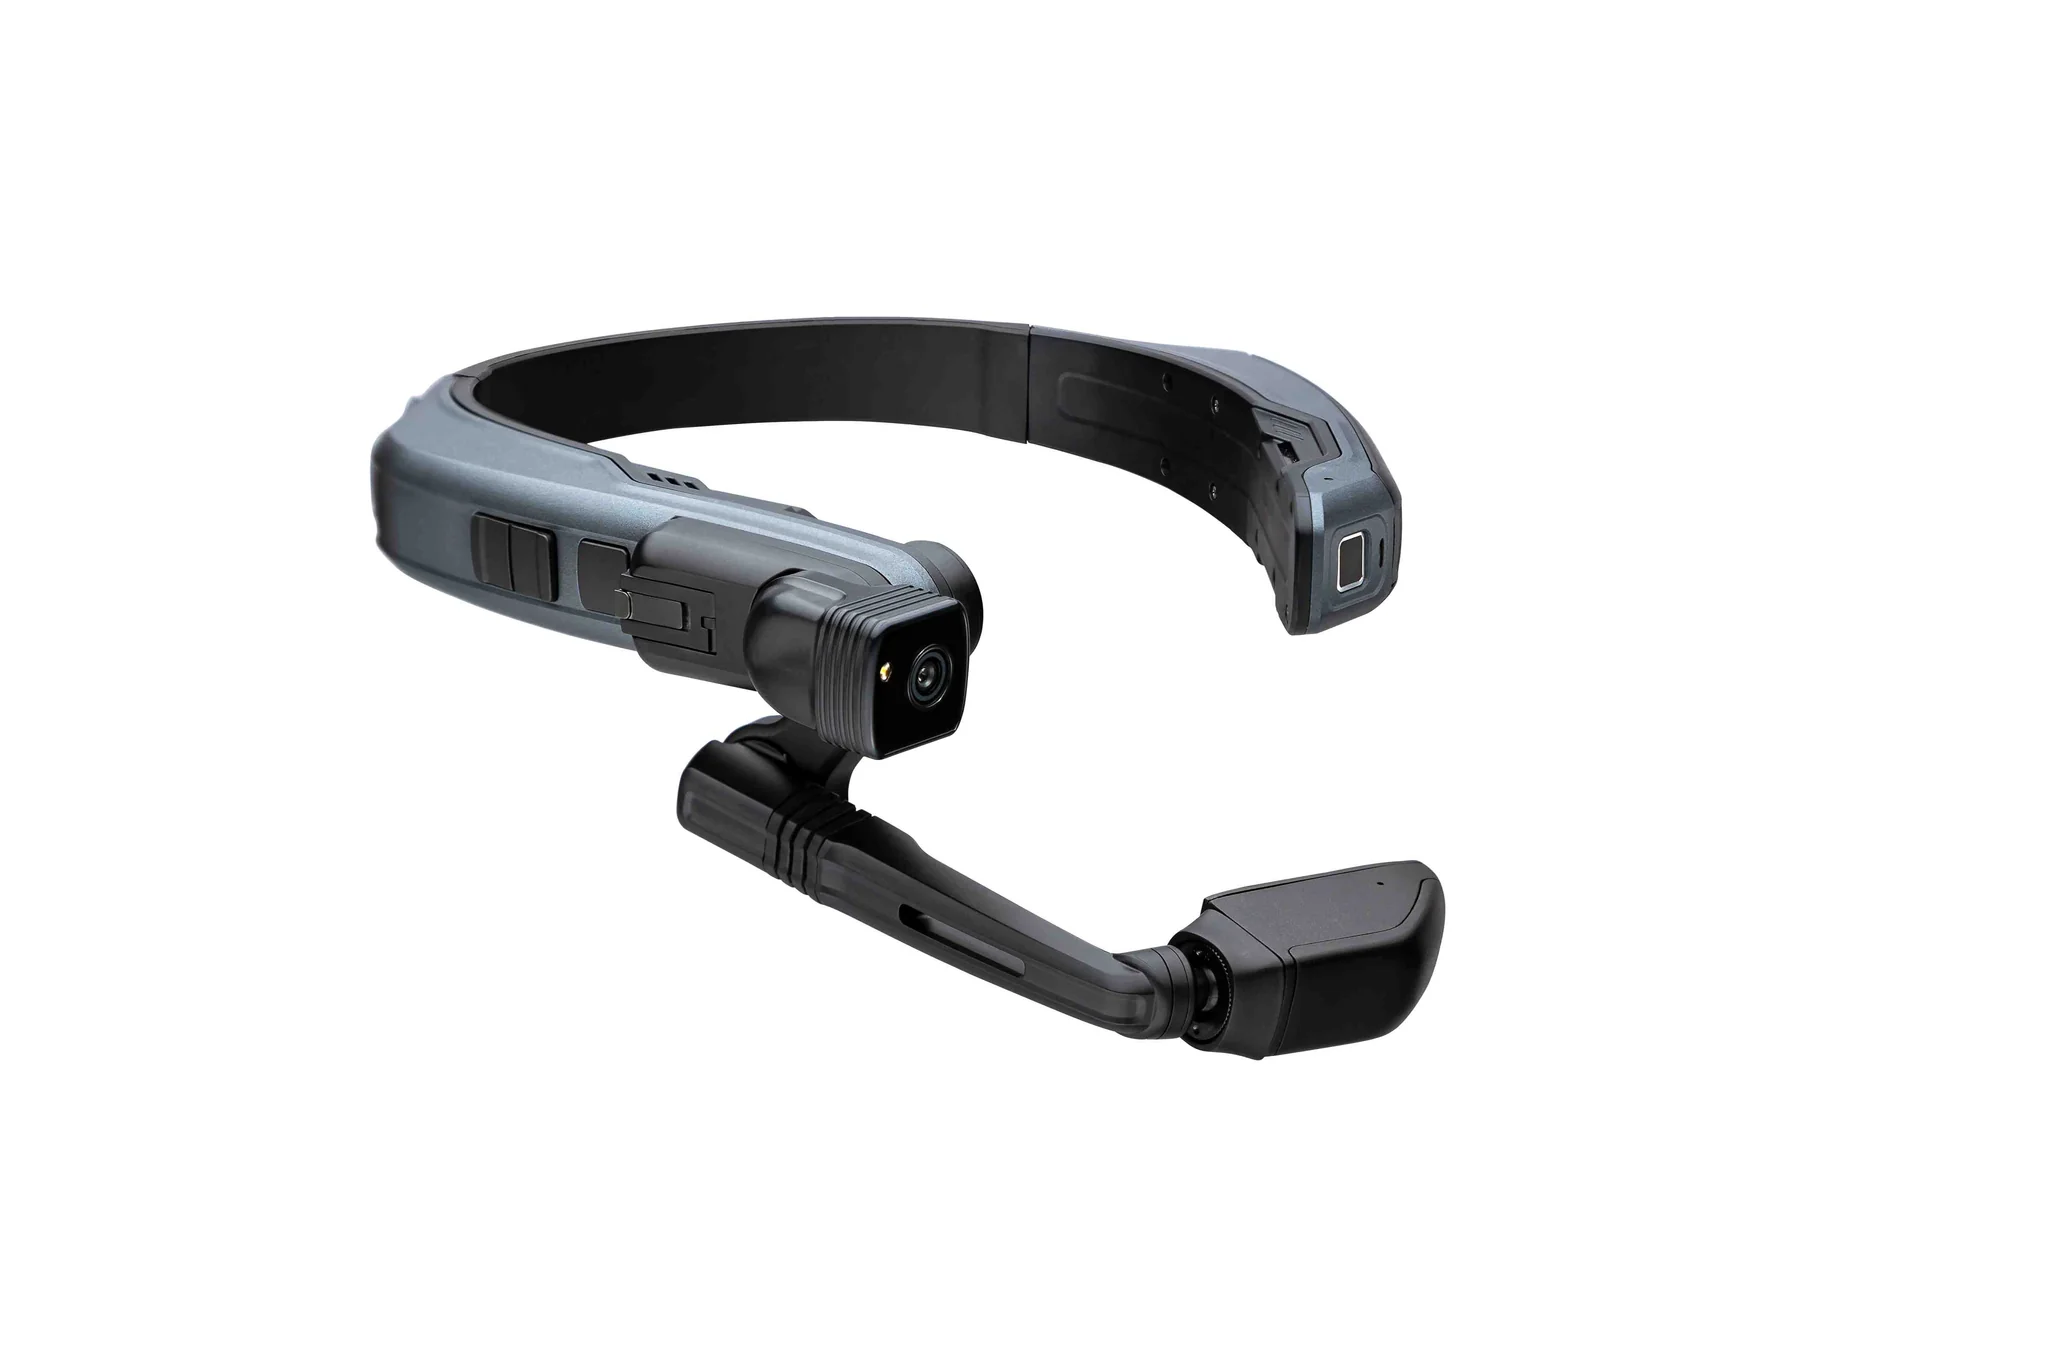
RealWear Navigator 500 assisted reality glasses These video glasses with built-in high definition cameras allow the wearer in a Video Call to live stream a video of what they are seeing. Paramedics or nurses, for example, can stream their field of view directly to a doctor or specialist in another location, to collaborate and receive live expert medical feedback while caring for a patient. They can connect via bluetooth and have wifi capability.
Watch a video showing how to use Vision Glasses in a Video Call
Watch a video demonstration of the RealWear 500 glasses being used in a Video Call
|
 |
Ultrasound image sharing
See below for two examples of Ultrasound images being shared into a Video Call. There are other products and use cases available but these examples show how easy it is to share an Ultrasound image in a call:
Visionflex
If you have Visionflex ProEX software installed on your computer or device, you can connect the USB medical device the computer and view the camera or scope in that software. You can then use Share screen to share the ProEX application into the call - sharing vision from the camera or scope and any results into the Video Call.
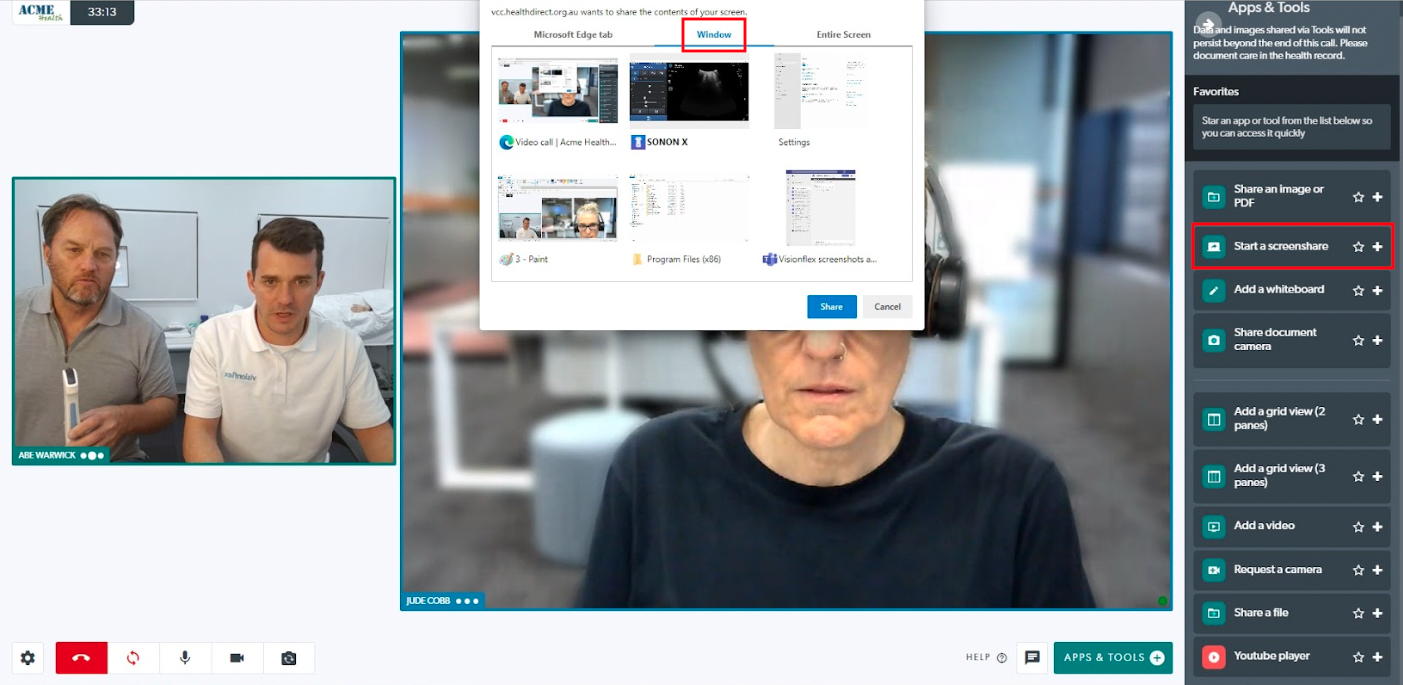
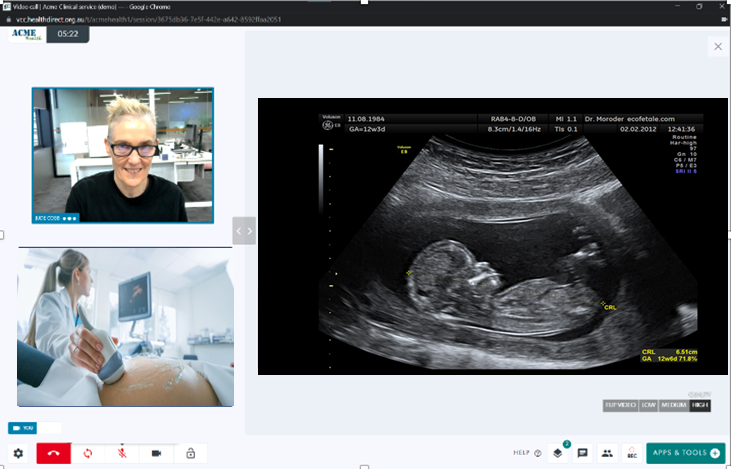
| In this example the clinician is with a patient and is preparing to share the ProEX software into the call to show an ultrasound image. Select Start a screenshare from the Apps & Tools drawer. Then select Window from the share options. Select the application you would like to share into the call. |
 |
| This image shows the ultrasound image and information coming through via the share screen application.. | 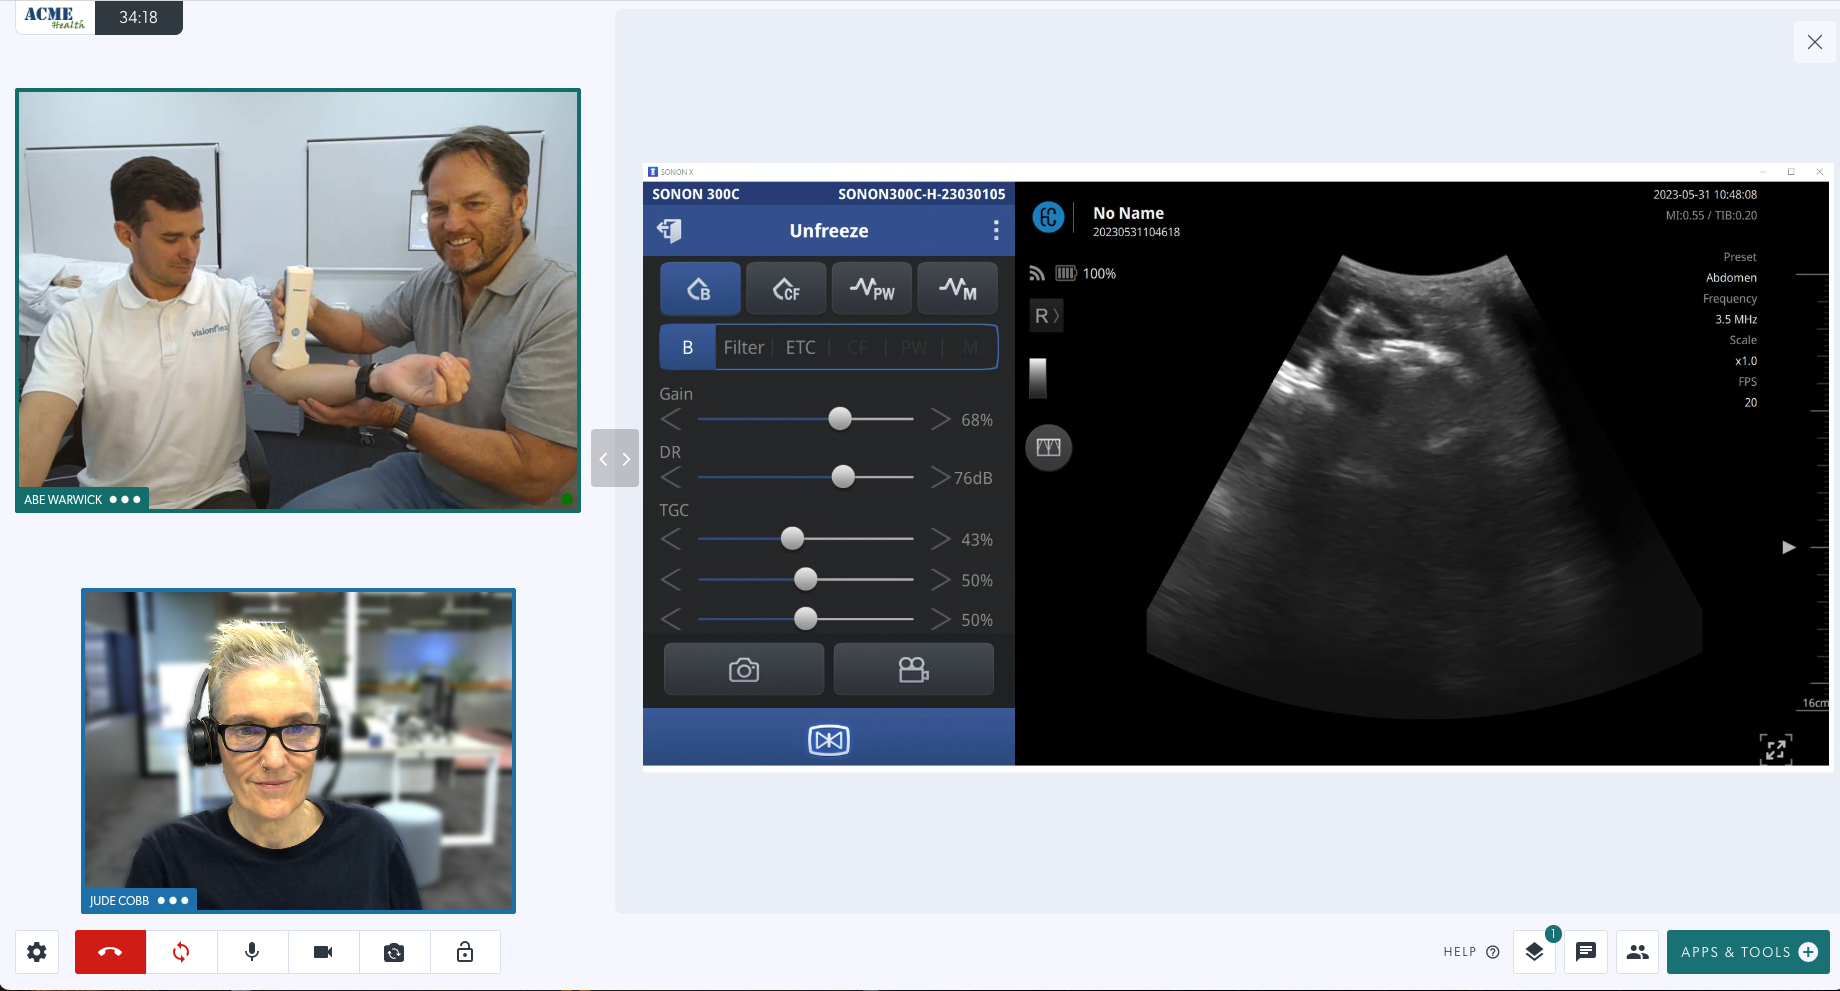 |
Capture card converting the Ultrasound image to USB:
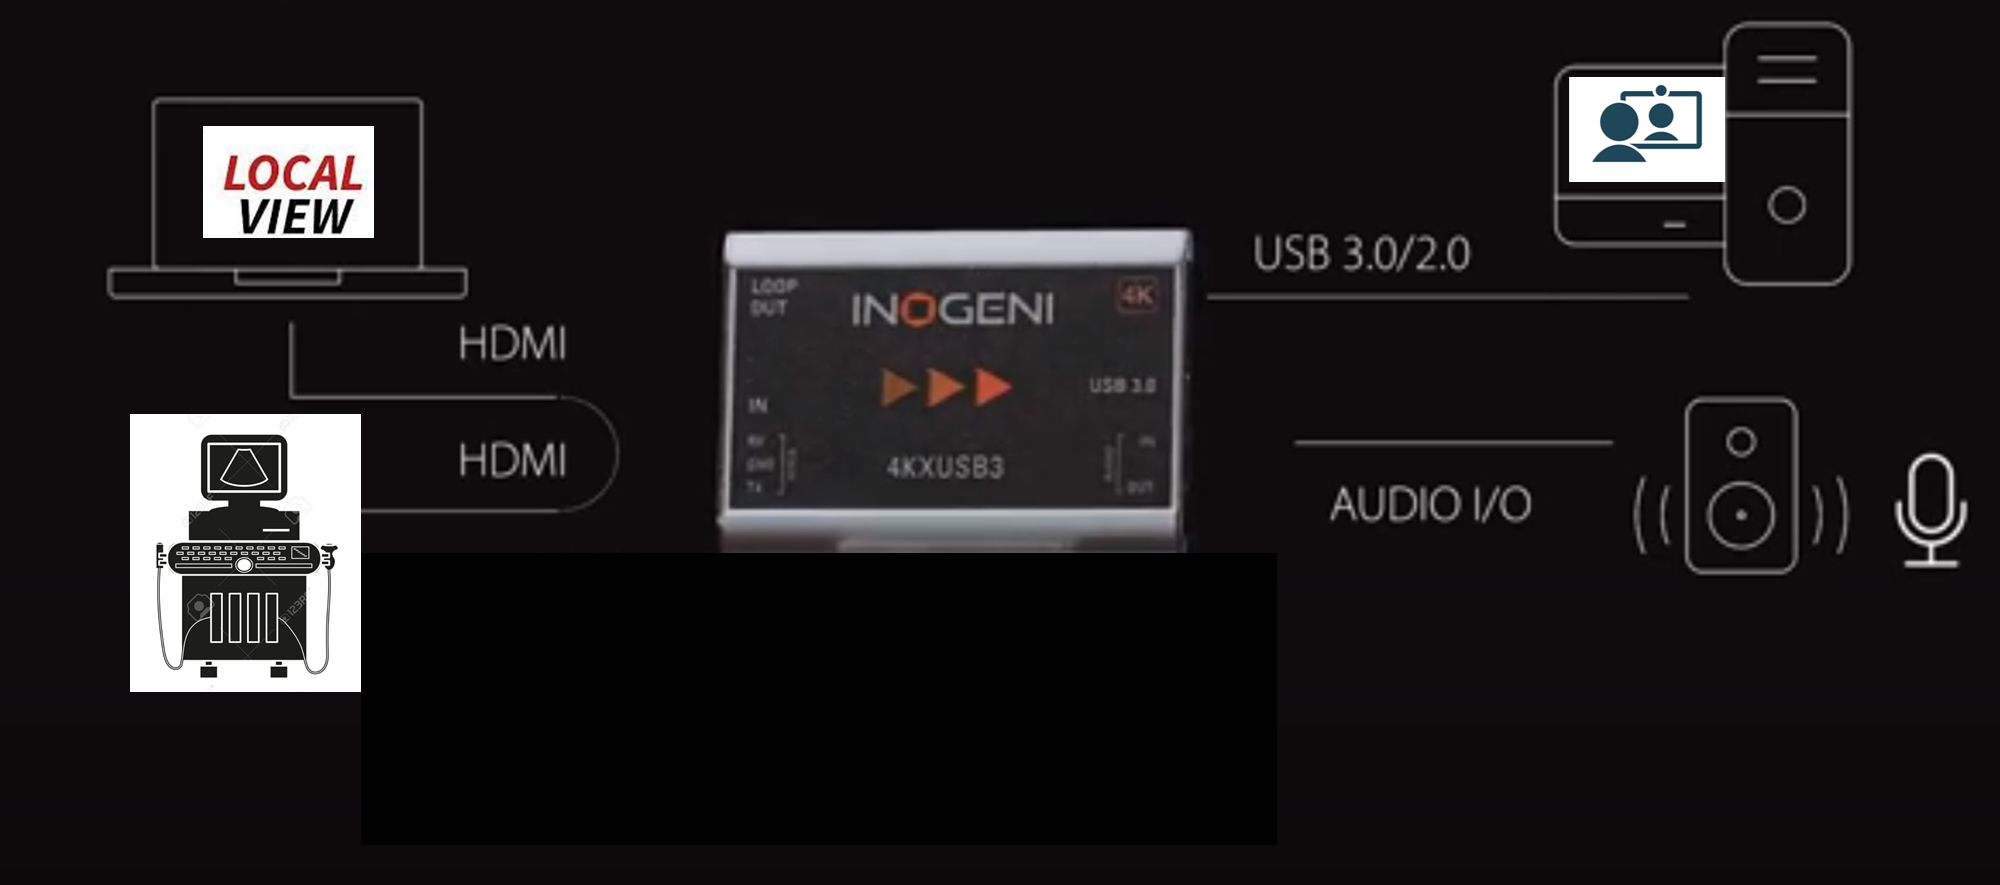
Using a capture card, for example the Inogeni card shown in the example below, you can convert video from HDMI to USB and stream the Ultrasound video directly into the Video Call.
|
Using the HDMI out for your Ultrasound equipment you can connect to a monitor to view the image. You can also use HDMI out to go into a capture card, as shown in this diagram, and convert the signal to USB. Then plug the capture card into your computer or device via USB and it will become available as a camera in the Video Call screen.
The capture card shown here will take uncompressed video and keep the high definition when converting to USB for output. |
 |
|
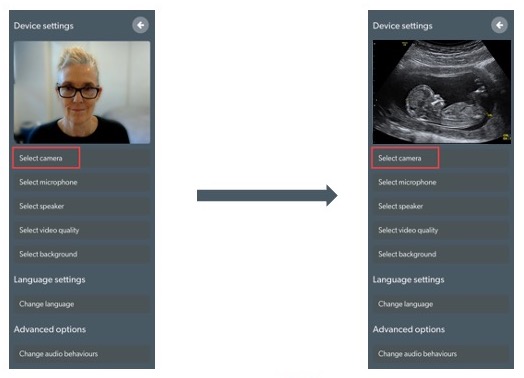
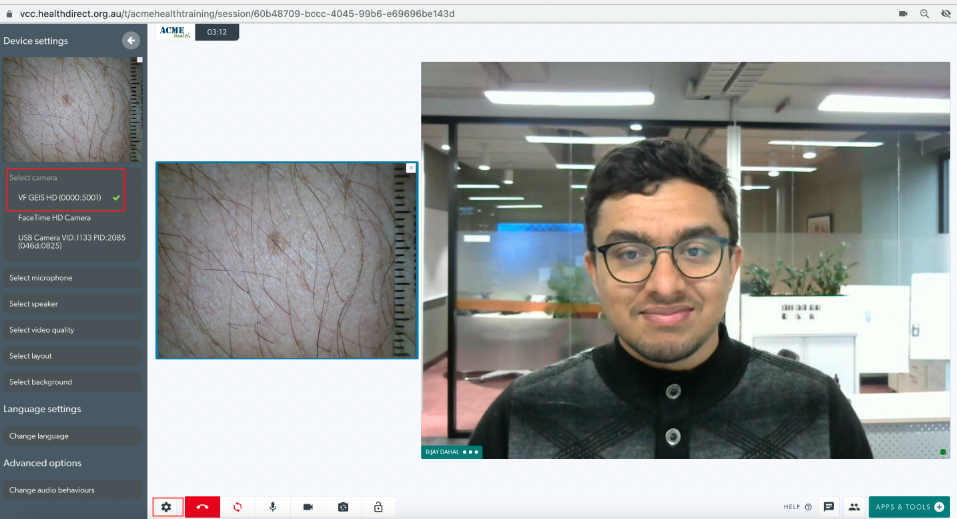
To connect the Ultraound video stream into your Video Call, ensure the card is connected via USB to your device and then go to Settings > Select Camera in the call screen.
Select the USB camera from your available cameras. This will change your camera to the USB connected camera, giving you and the remote clinician(s) the following options:
|
|
|
You also have the option to share the Ultrasound image as a second camera, as shown in this example.
Note the video quality settings under the Ultrasound image. Set this to High for the best resolution. |
 |
How to select a scope or camera in a Video Call
There are a number of ways to share a camera or scope into a Video Call, depending on your clinical requirements. The examples below outline the available options:
|
1. A health service provider with a patient can plug in a USB device, click on the Settings cog (highlighted at bottom left) to open the Settings drawer and select the device as their camera (switch camera). This will replace their camera feed so the specialist at the other end will no longer see them or their patient on the screen. They can then use the scope to conduct an examination, which streams live into the call. With this option the person sharing the camera can use the Flip Video button, to flip the view of this camera horizontally for their view, if desired. |
 |
|
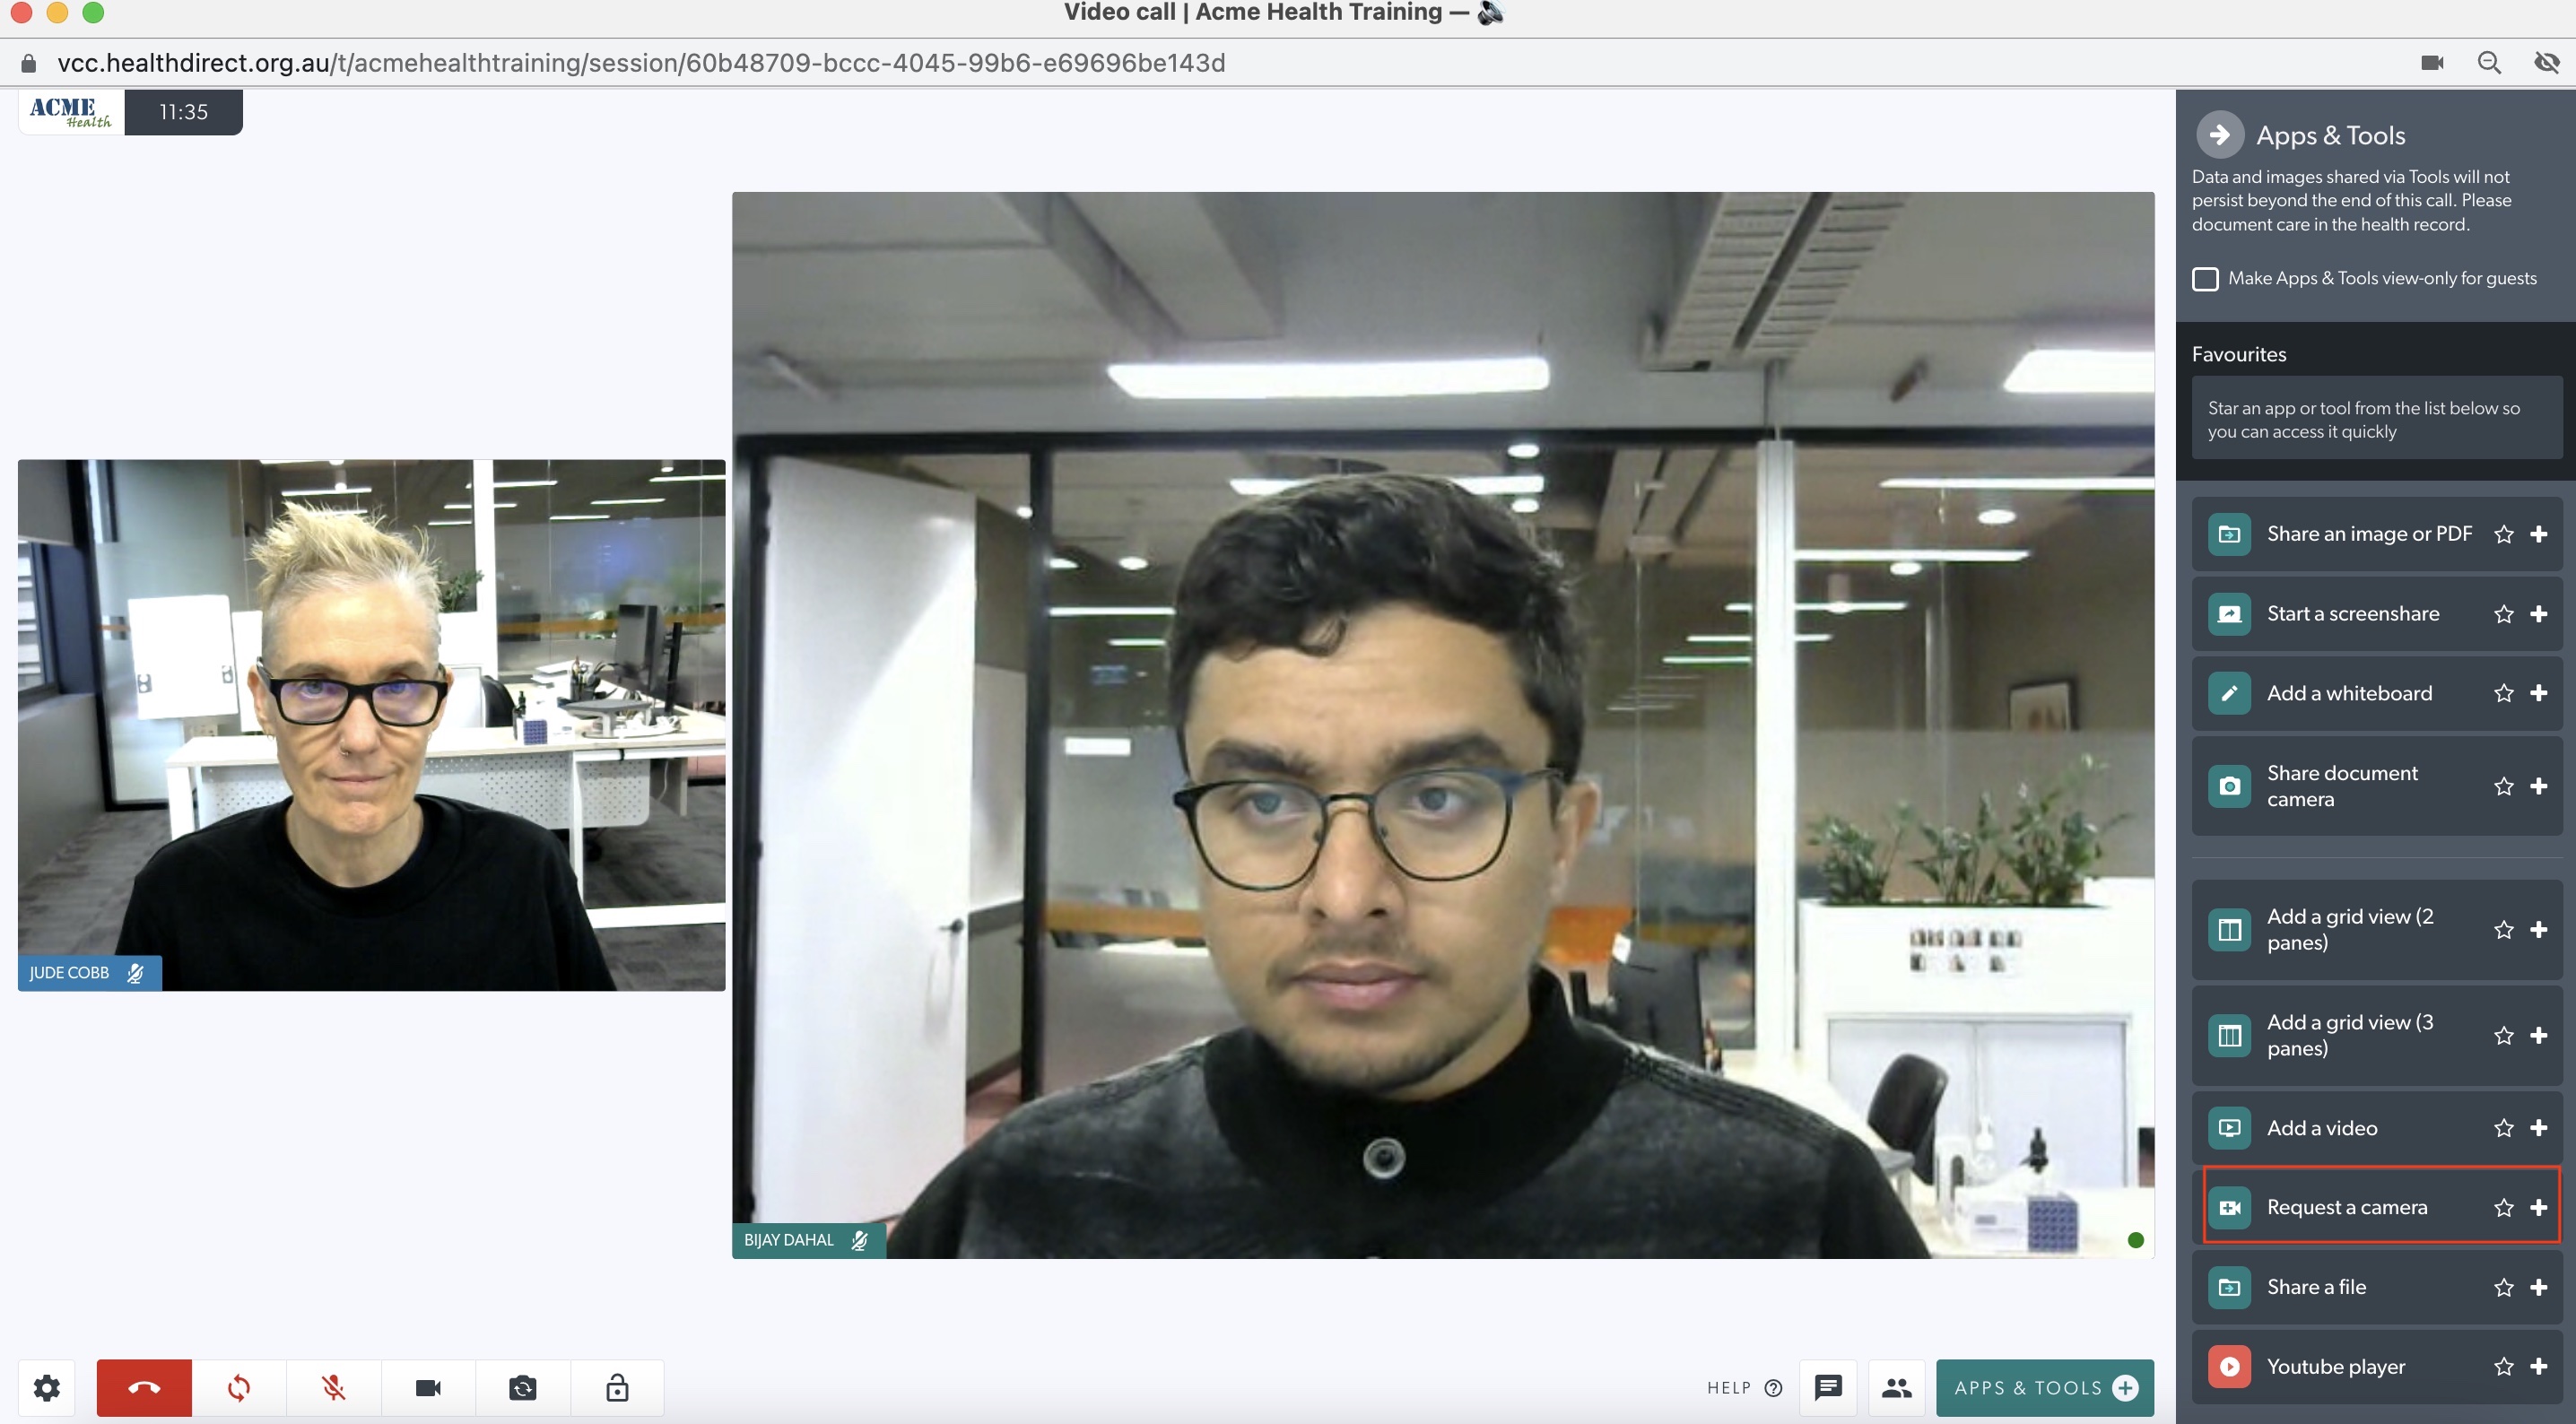
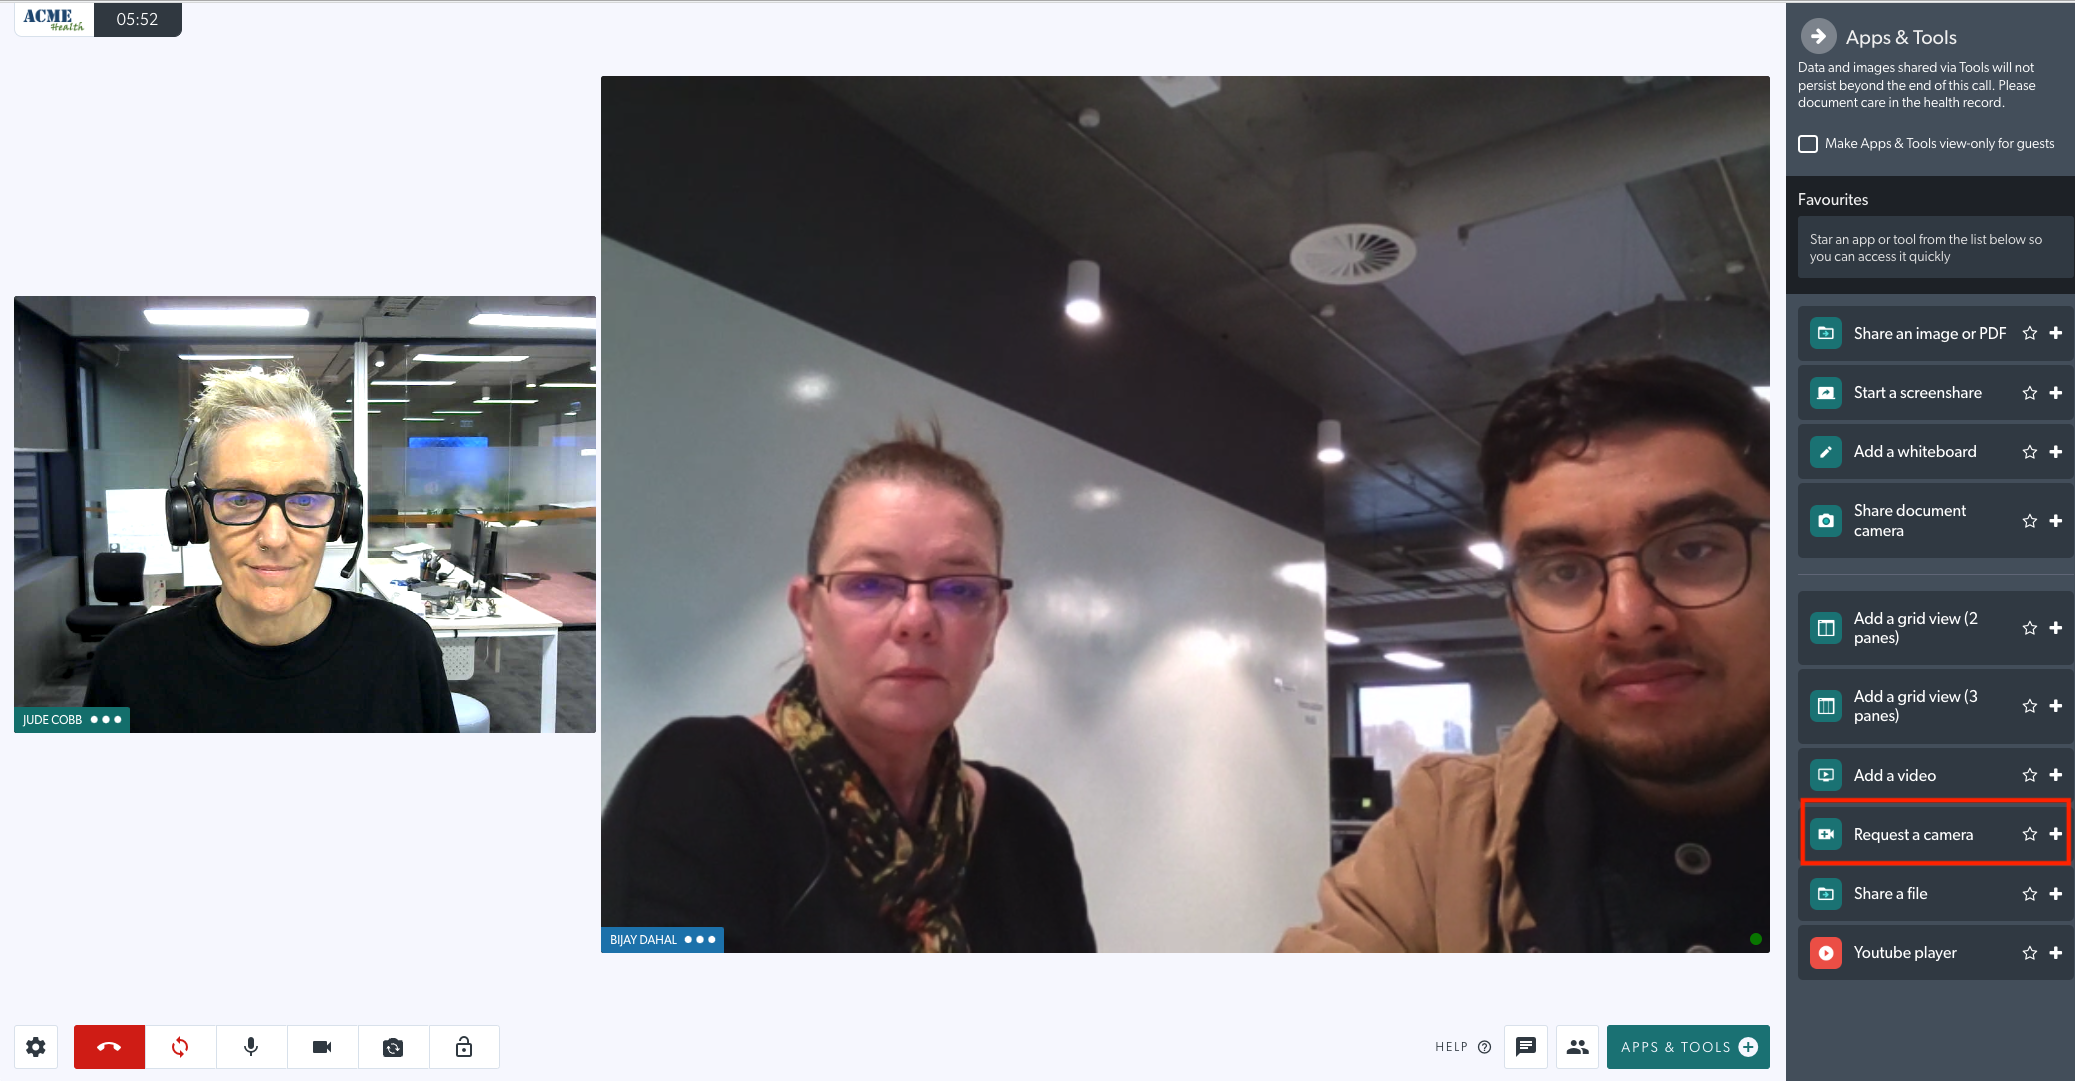
2. During a Video Call, a specialist or doctor can request a camera from a health service provider who is with a patient. To do this they go to Apps & Tools and select Request a camera. |
 |
|
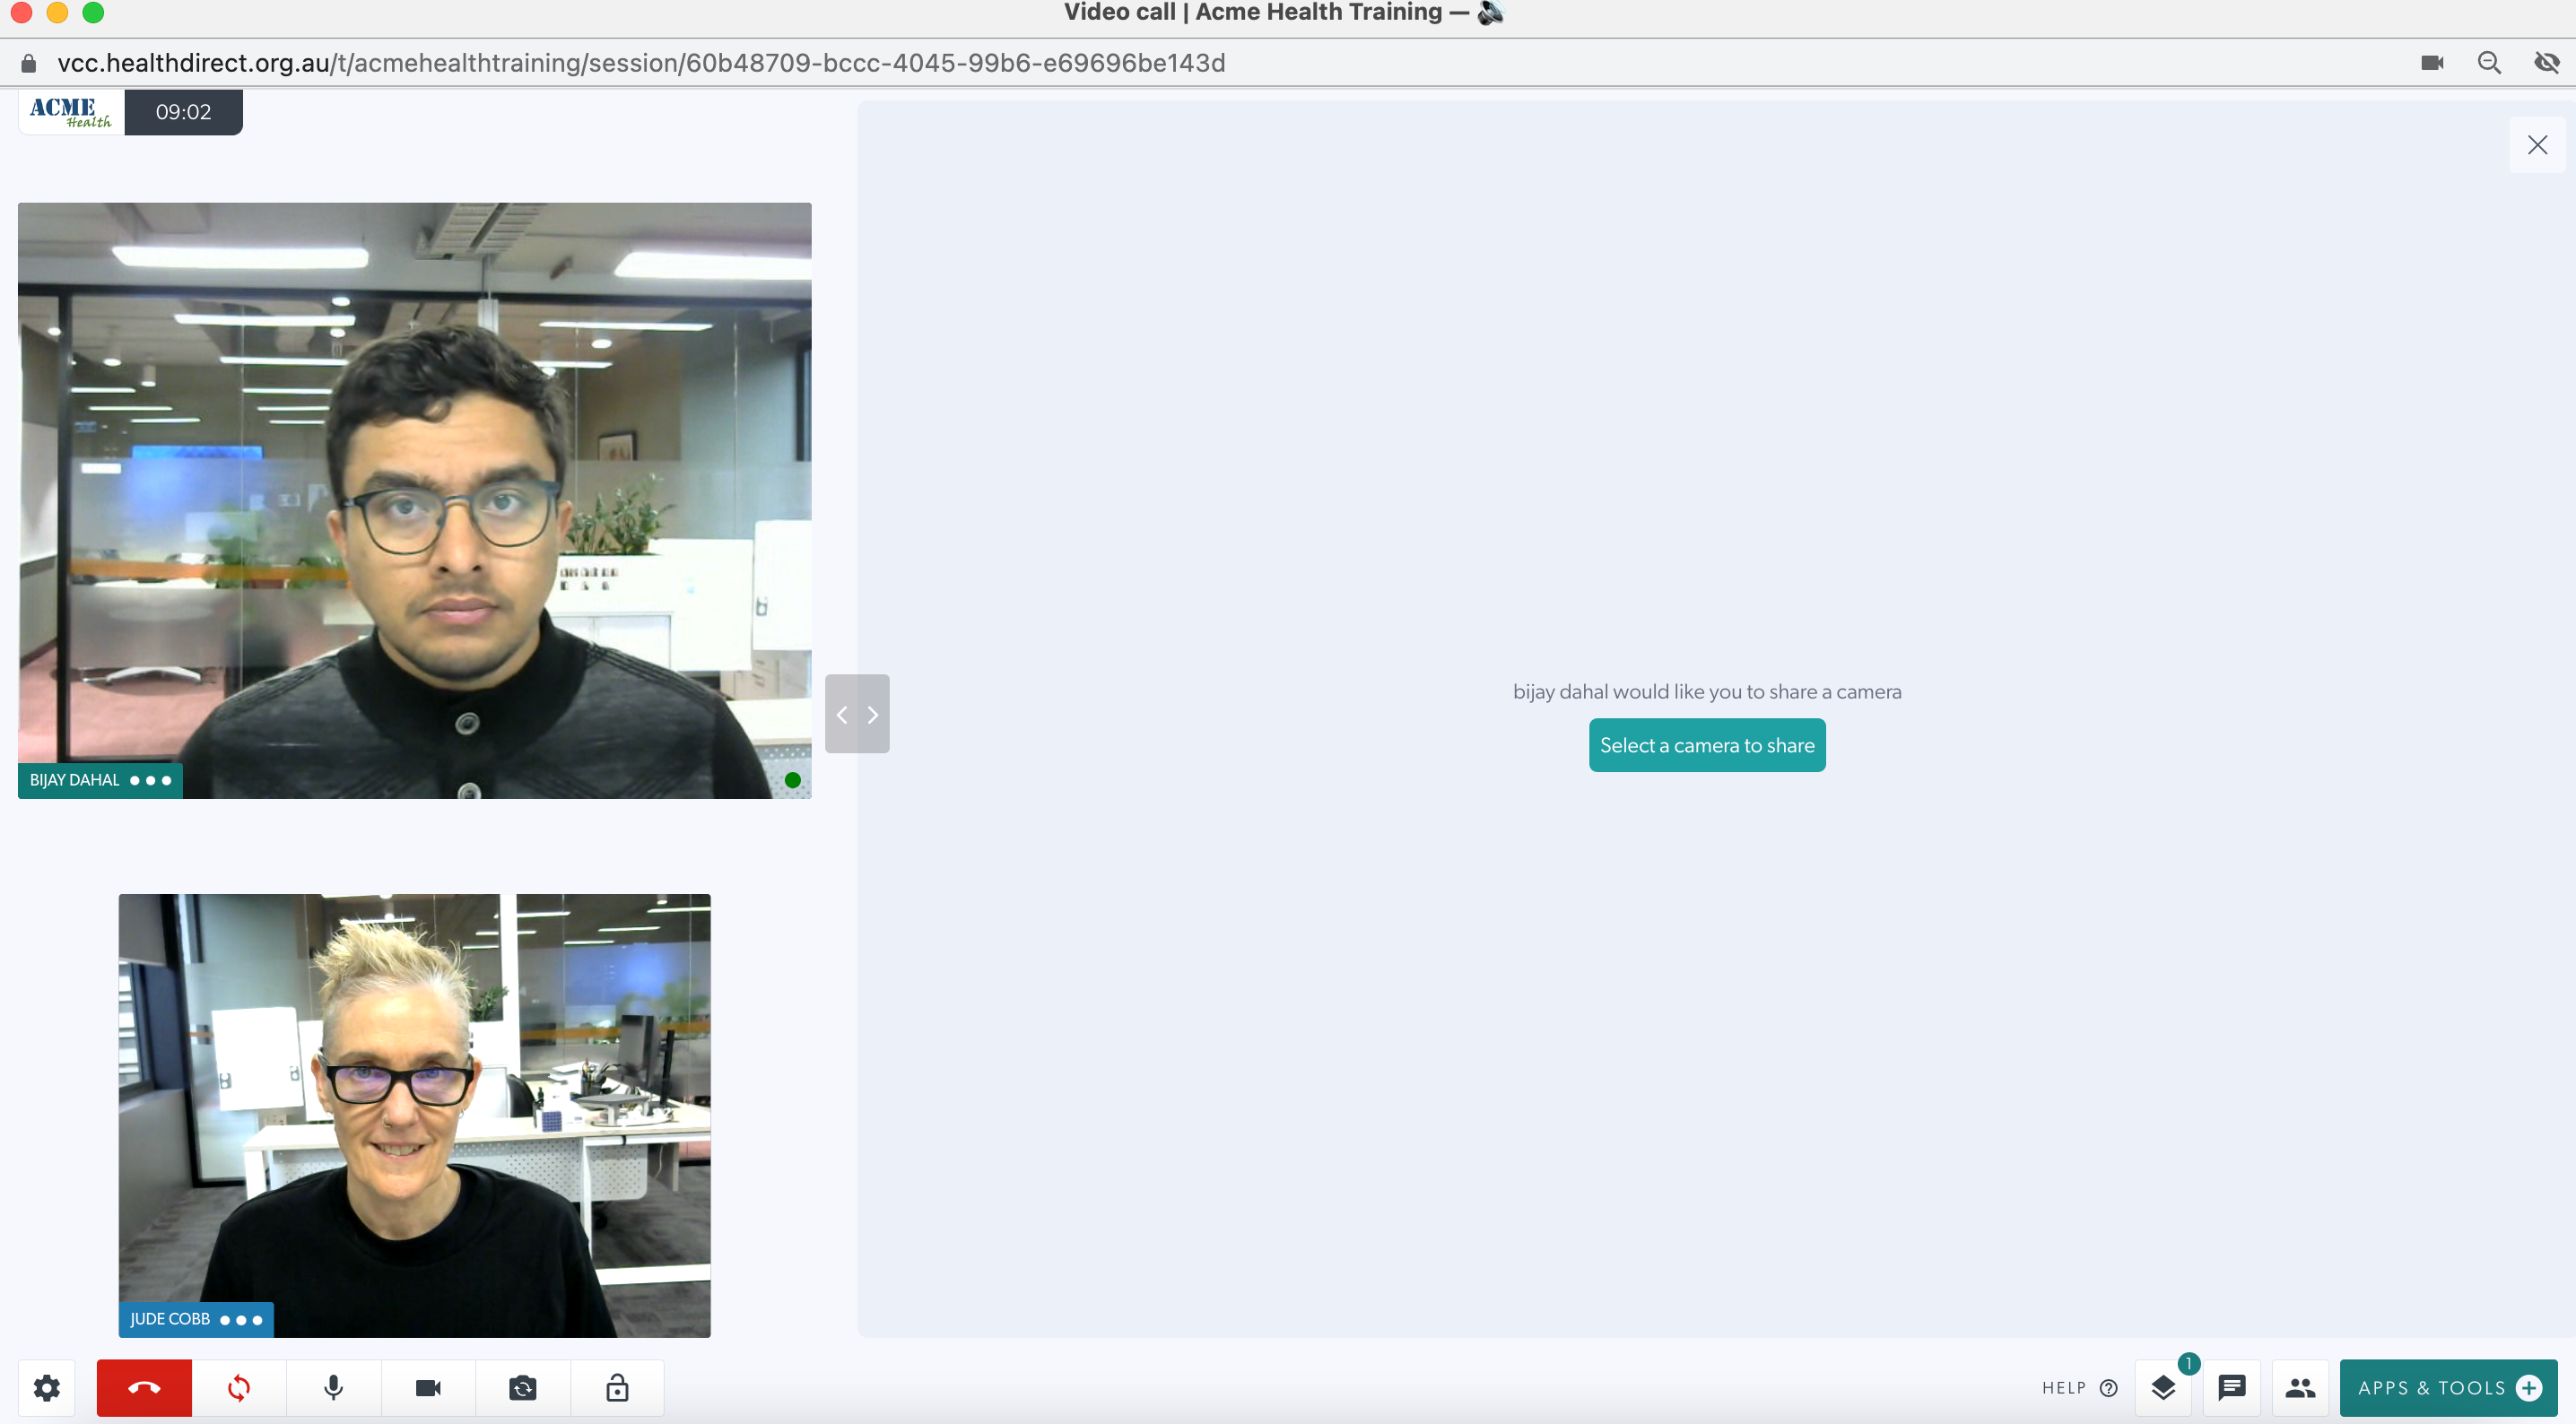
Once requested, the health service provider who is with the patient will see this screen. They click on Select a camera to share.
|
 |
| From the list of available cameras, they then select the medical device to share into the call. With this workflow, all participants will remain on the screen when the scope or probe shares into the call. | 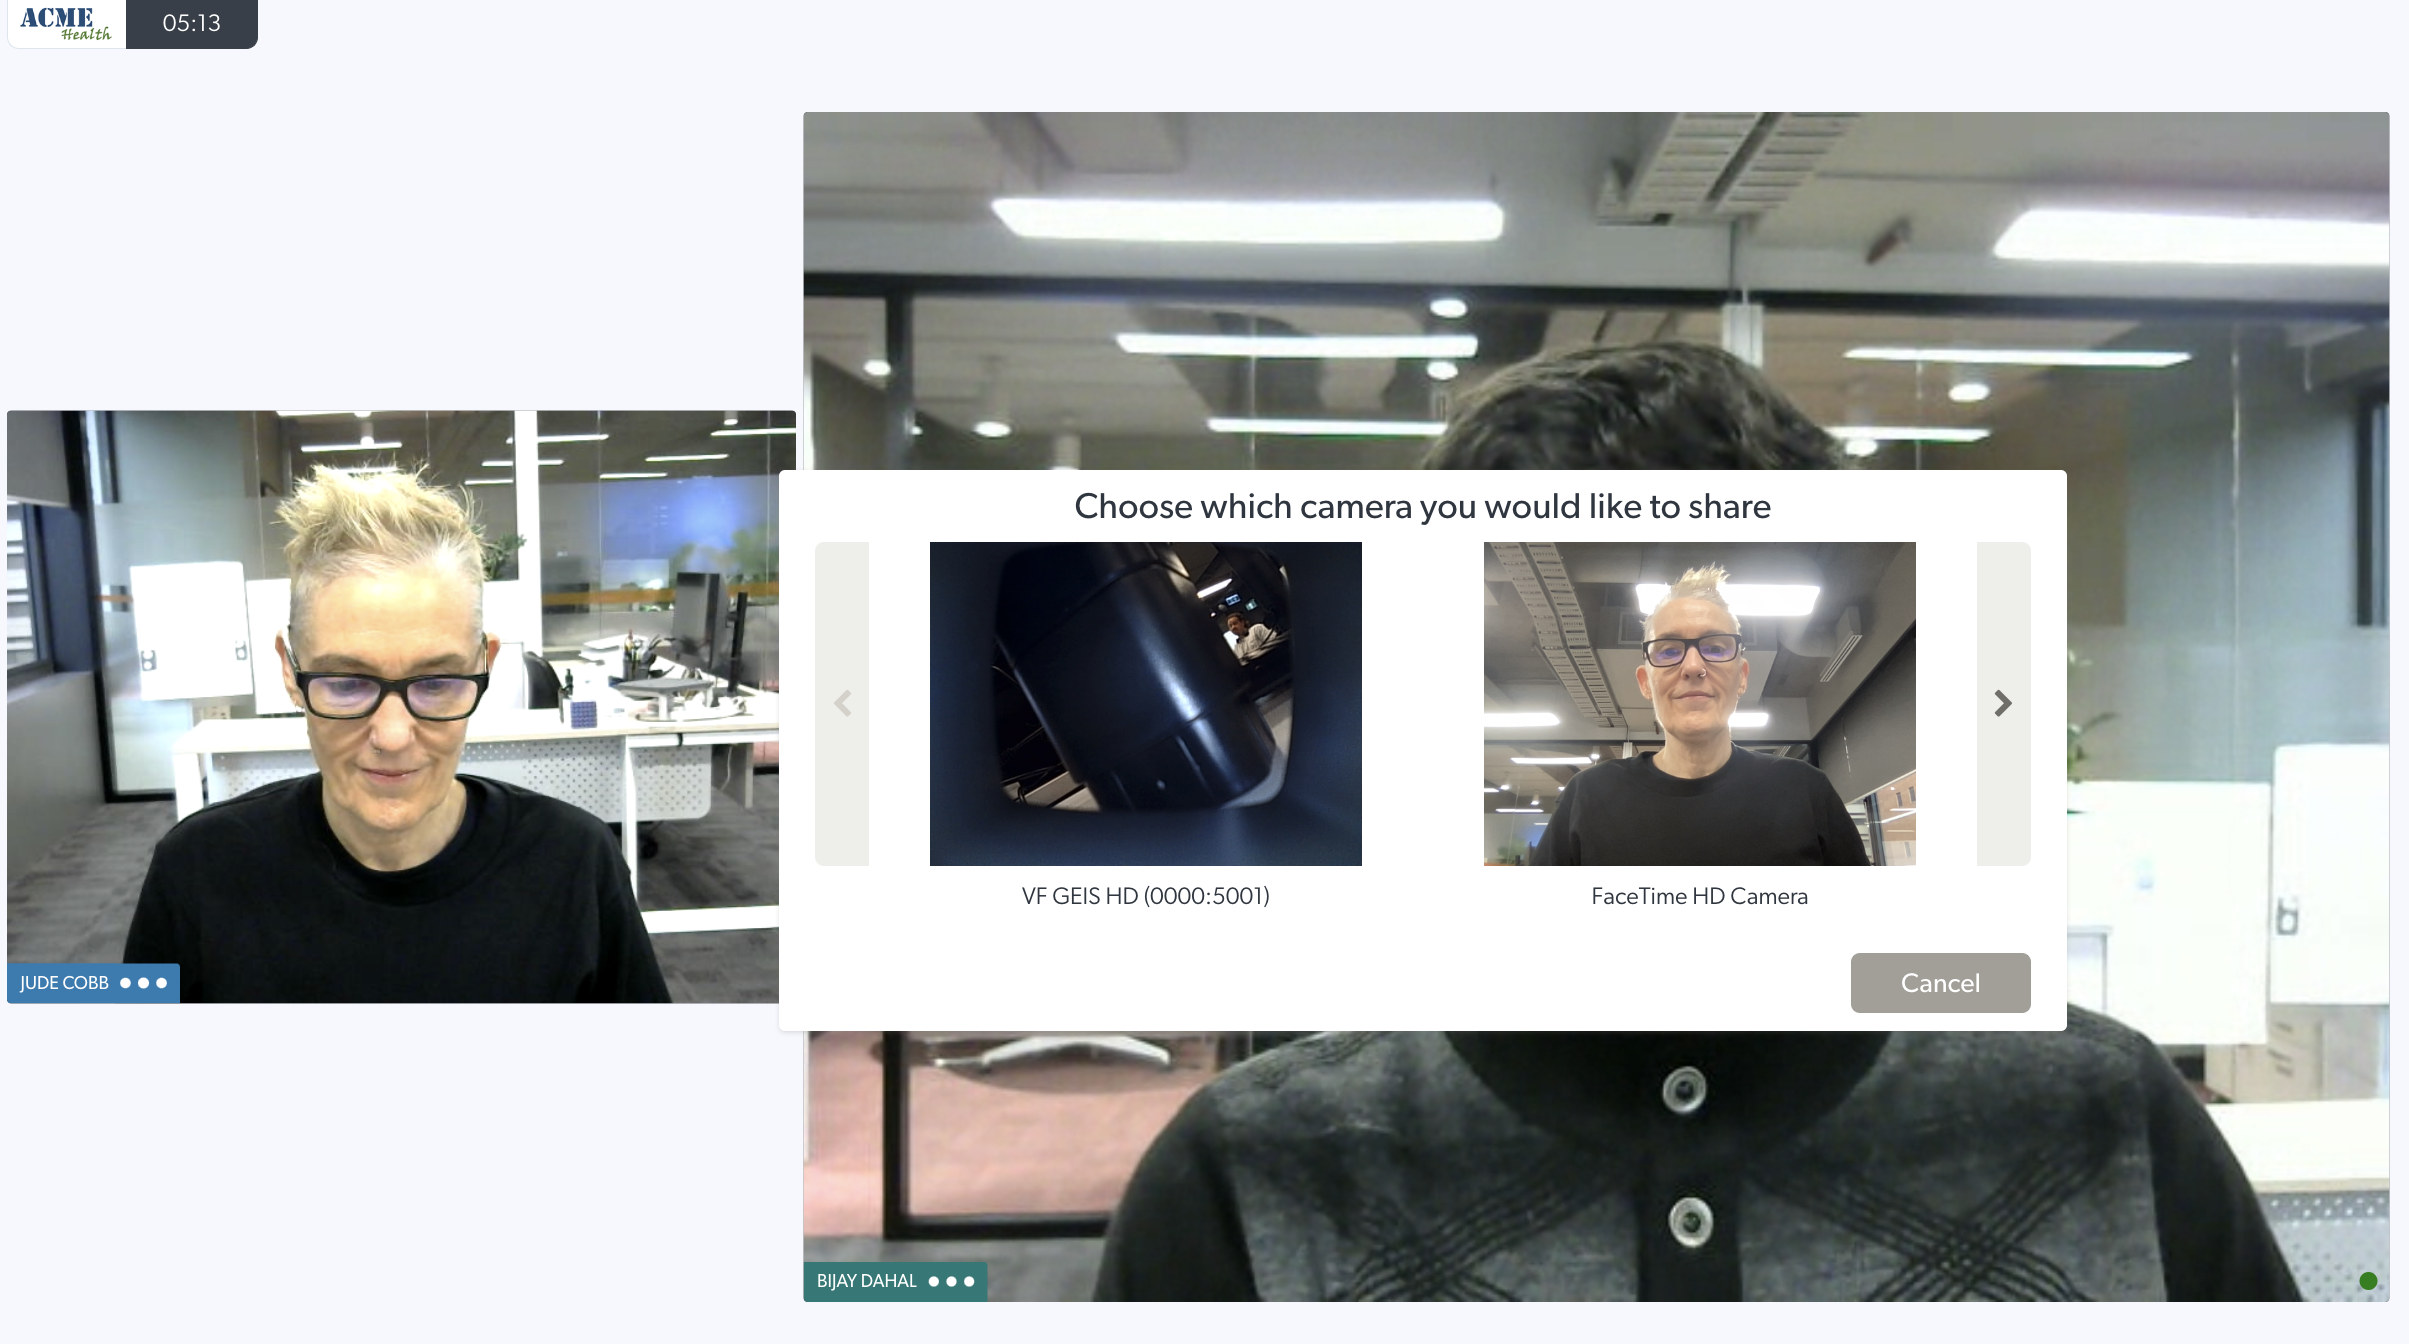 |
| The specialist viewing the shared camera has the option to select a Video Quality, as highlighted in the bottom image under the shared camera image. Many scopes are Full High Definition, so High can be selected. | 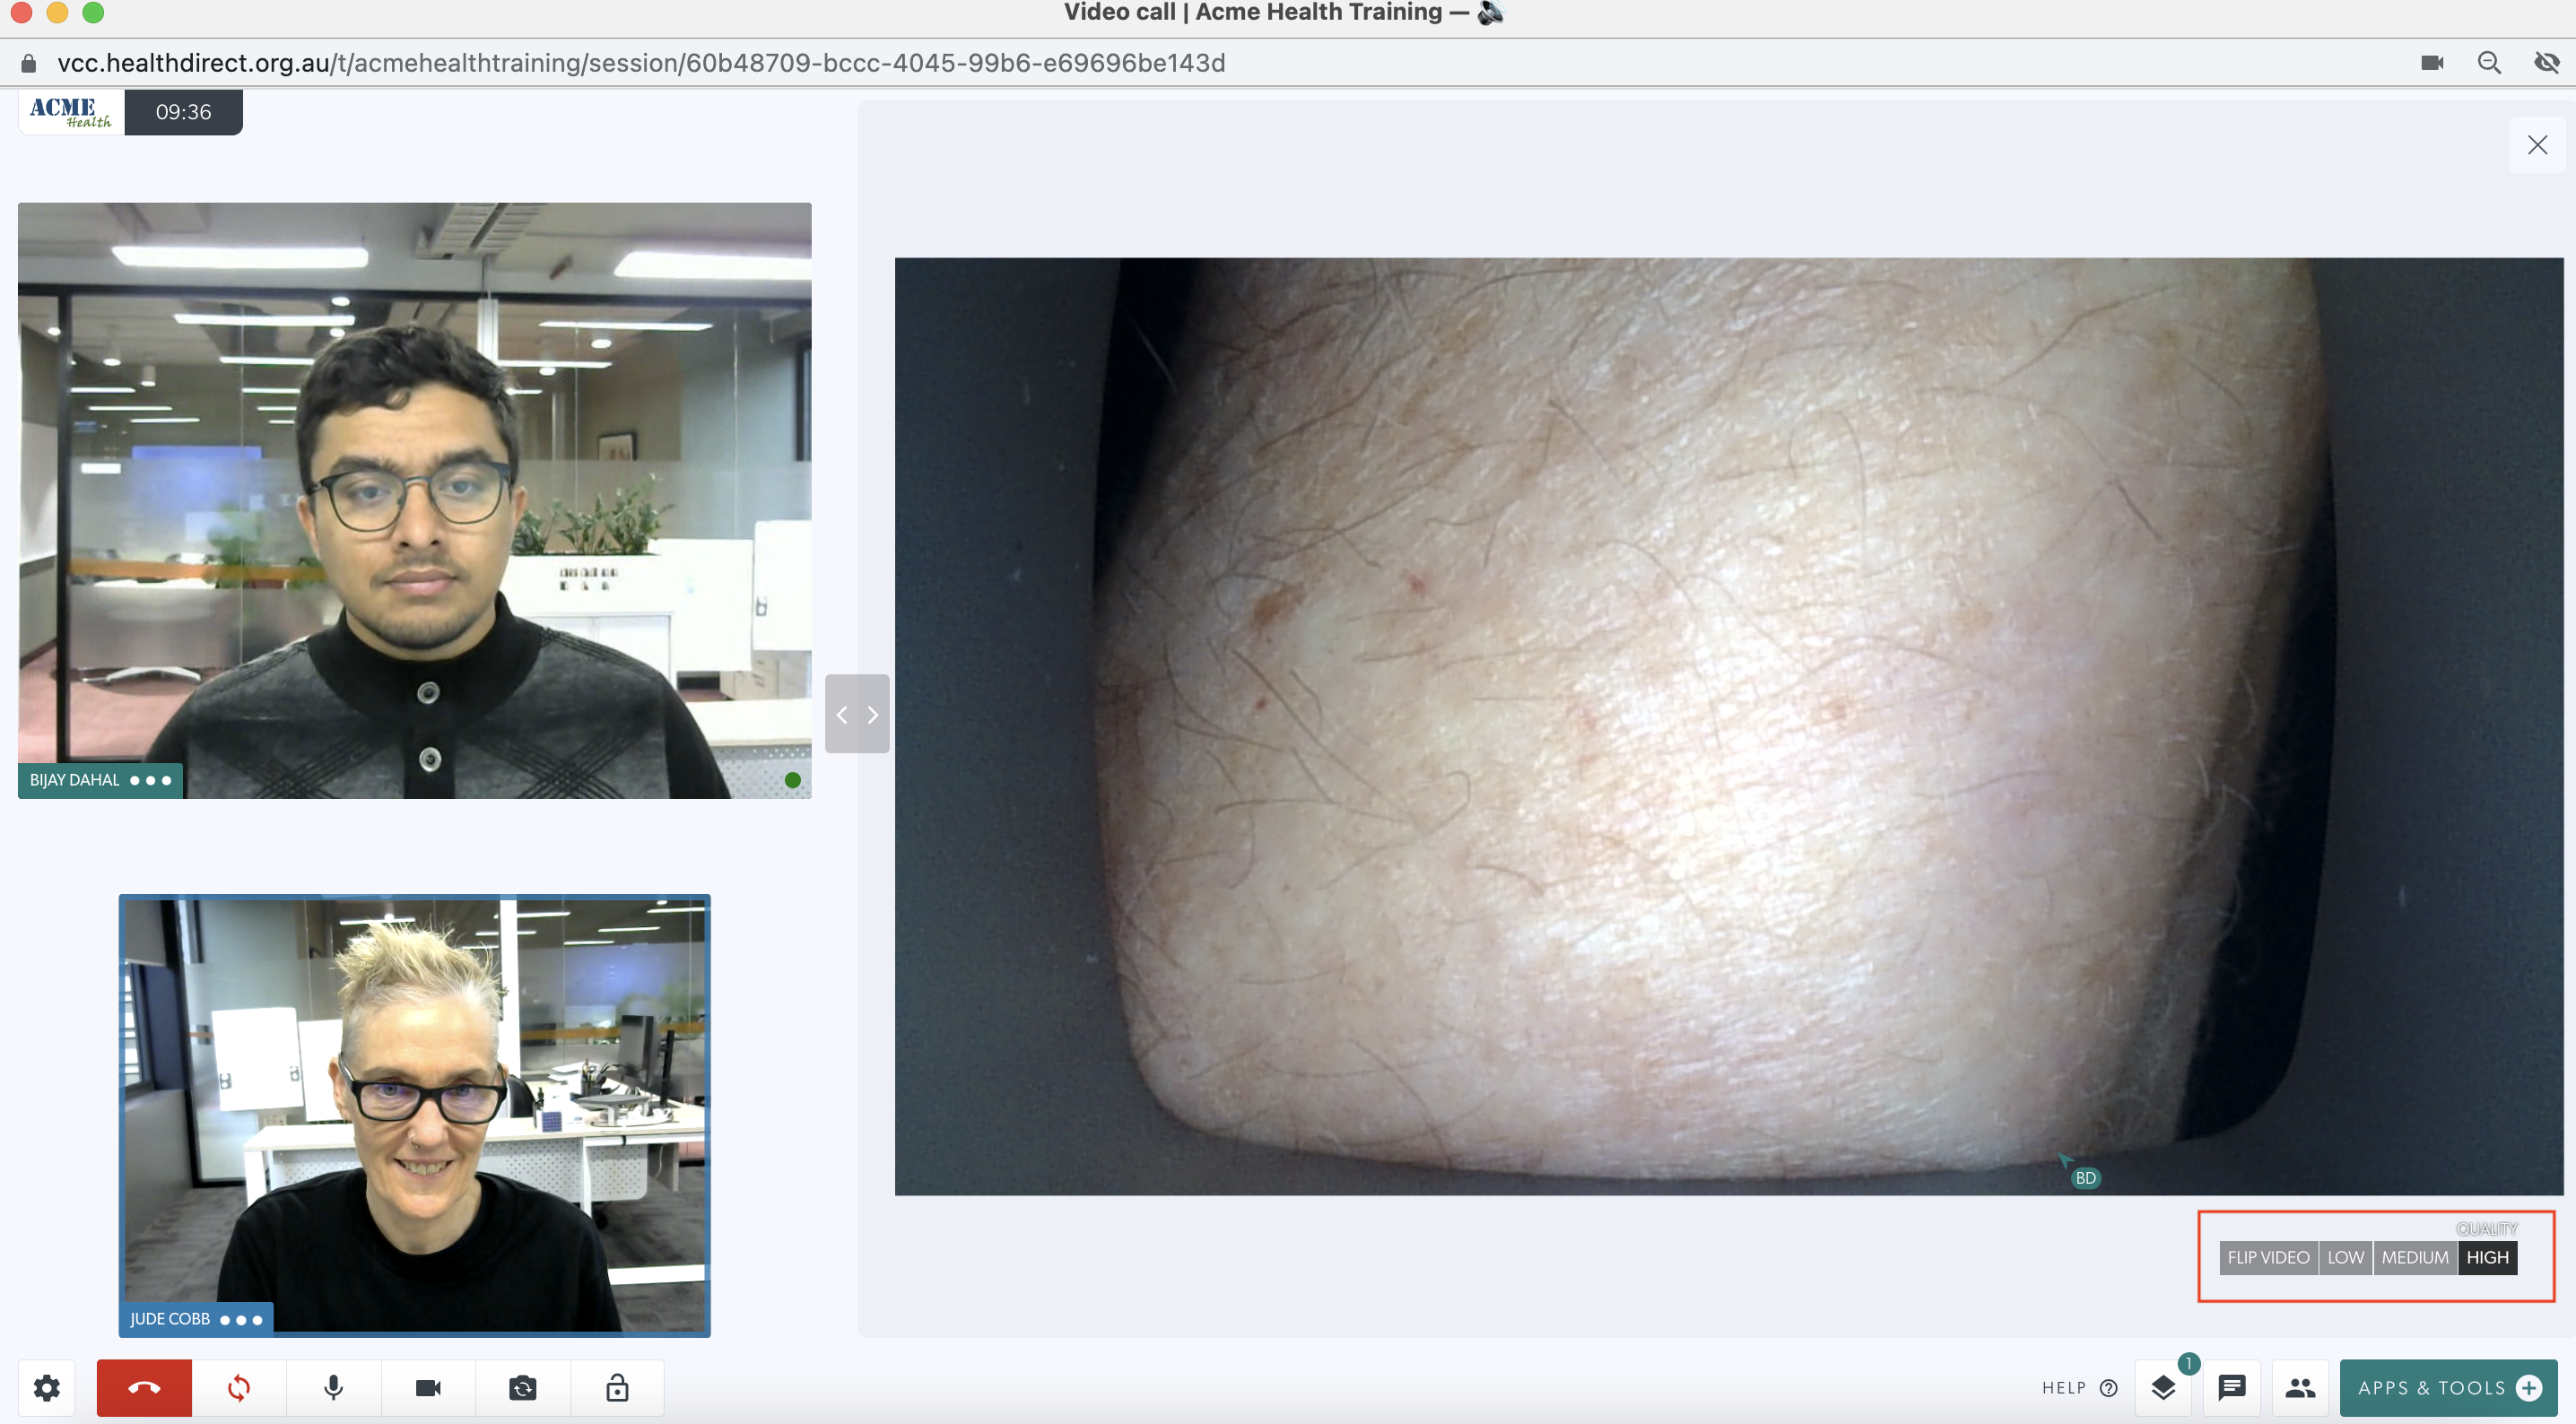 |
|
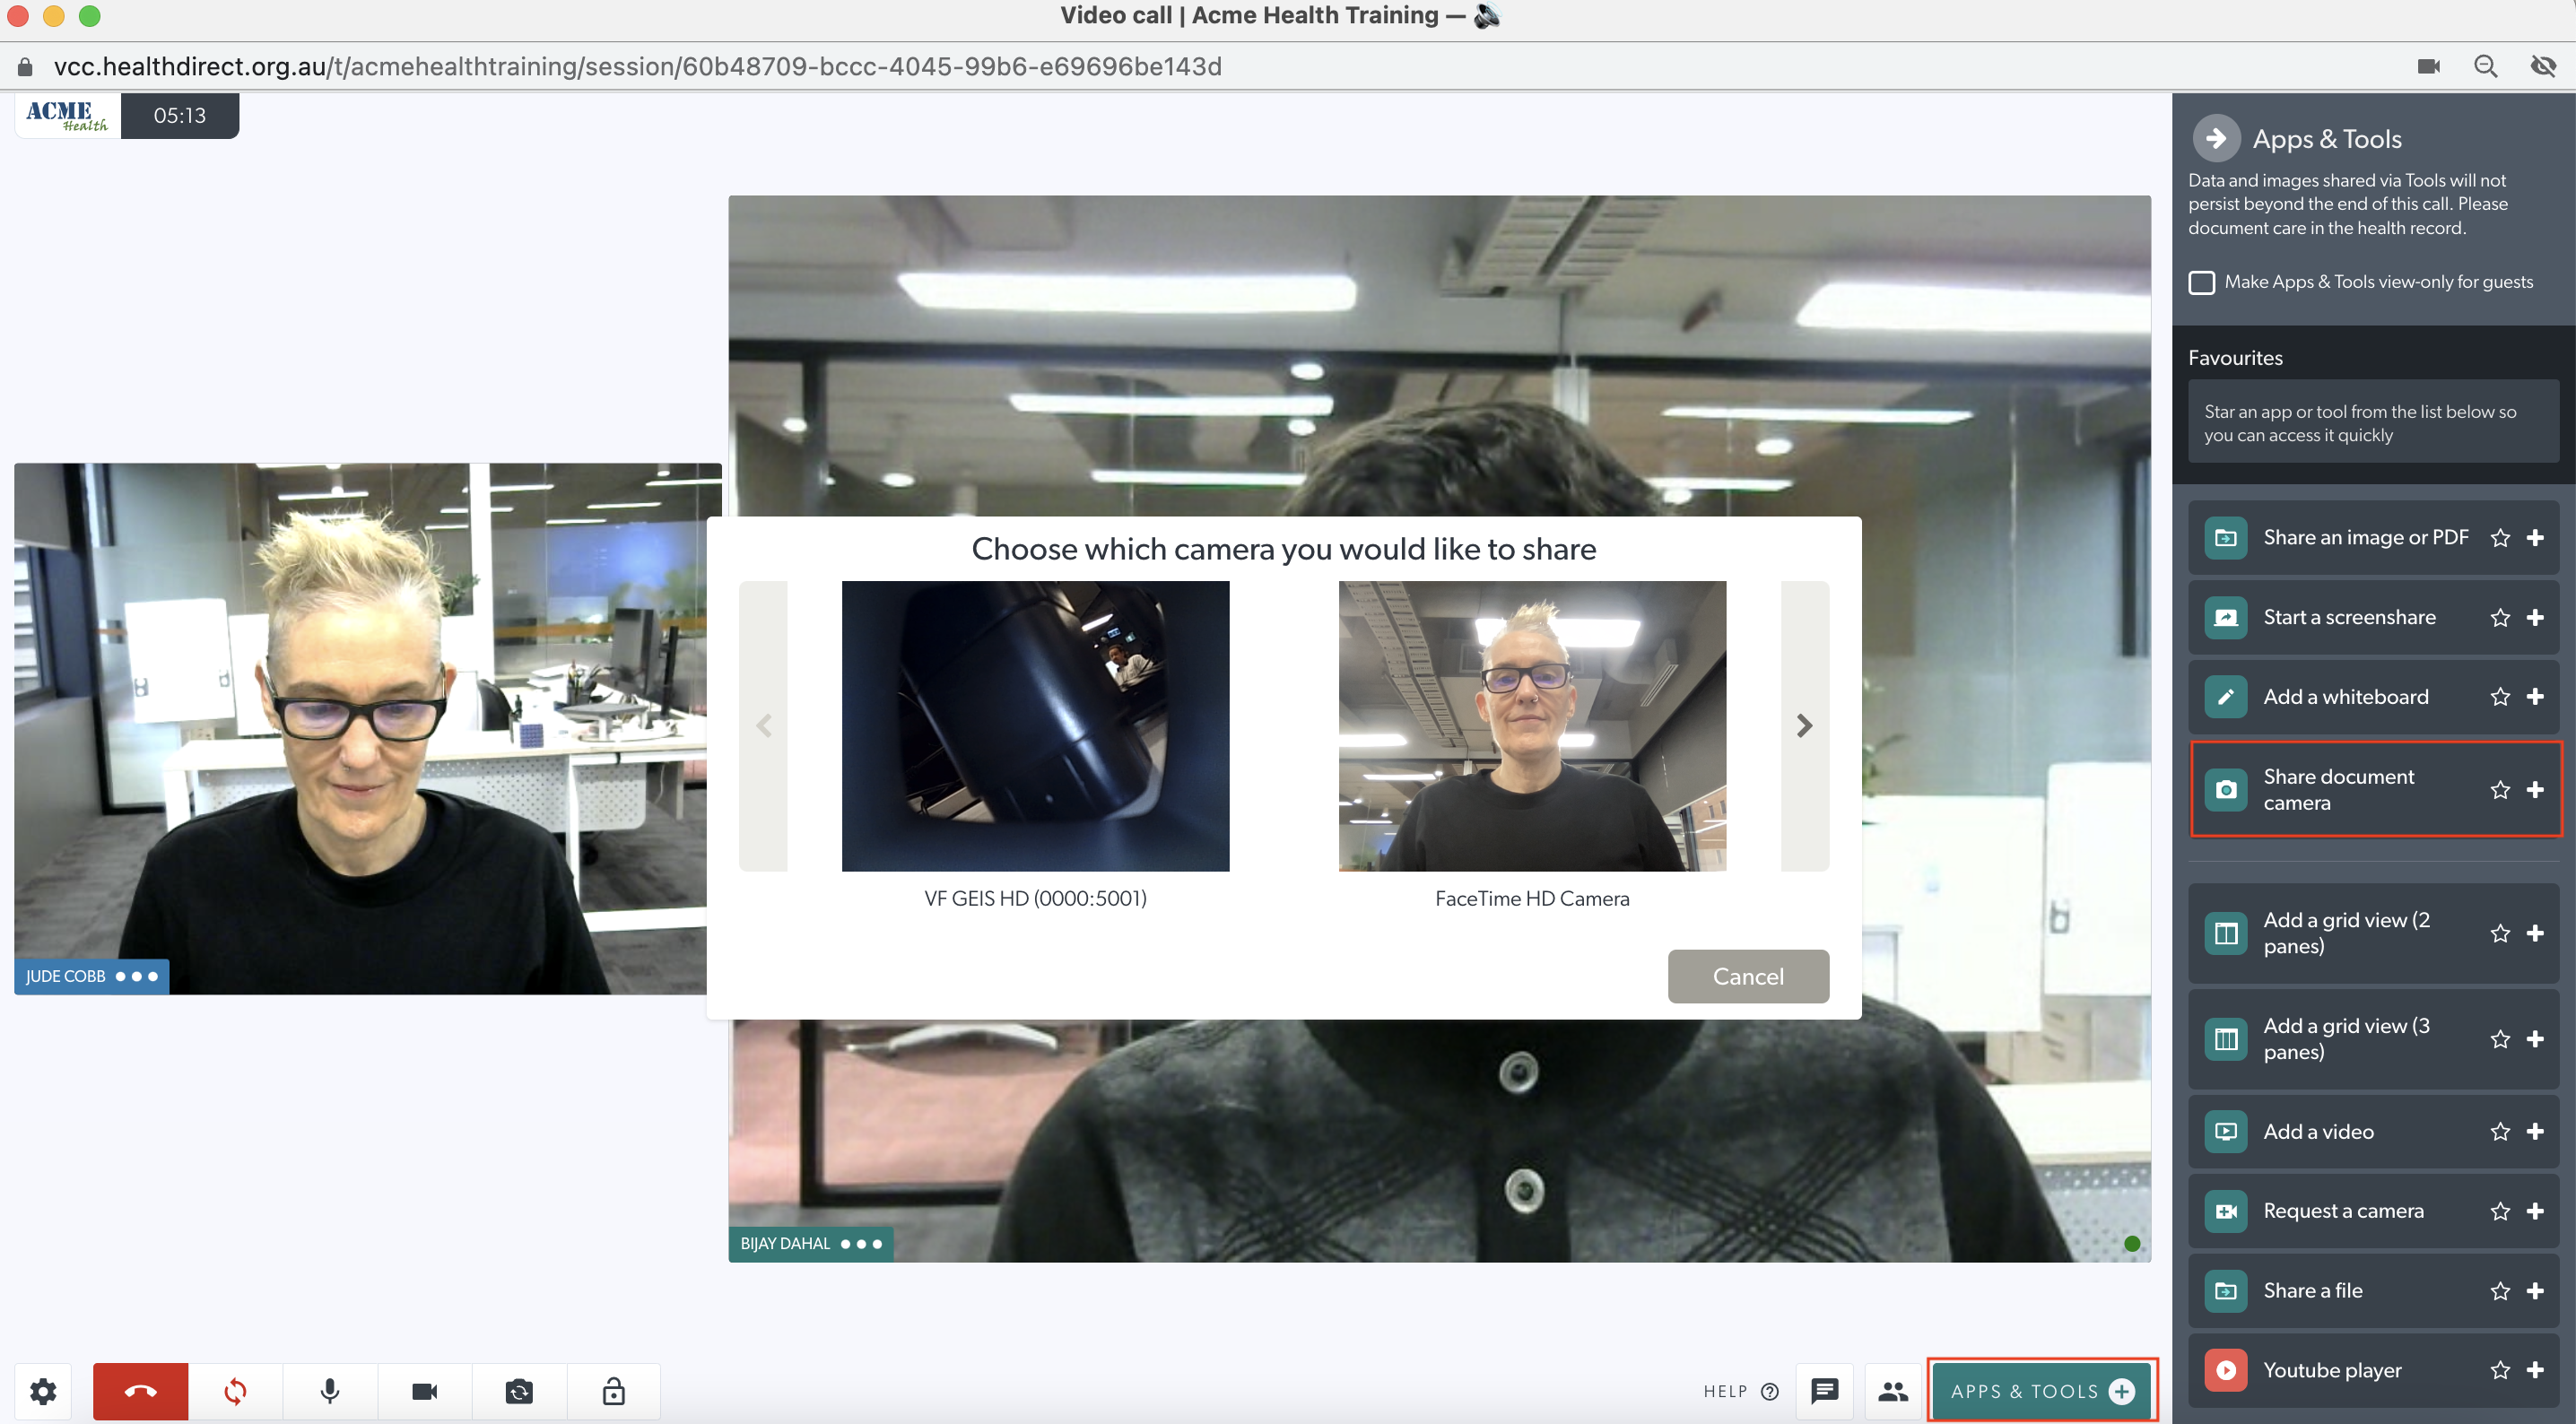
3. A health service provider with a patient can share a Document Camera into the call, however please note this option supports a camera with high resolution but has a low frame rate - so if there is any movement this will make the image appear blurry. Click on Share Document Camera in Apps & Tools and select the required camera from those available for your device. |
|
Visionflex device use case examples
General Examination Camera HD
This medical imaging device allows the operator to perform a wide range of examinations while the camera is shared in a Video Call. A health service provider, such as a GP or nurse, who is with a patient can share the camera into a Video Call with a specialist in another location, to help with diagnosis and treatment guidance.
The General Examination Camera (GEIS) has a wide range of clinical uses, some which are outlined below:
|
1. Skin Examination using switch camera
Set the Video Quality to Full HD for a full high definition image. The remote specialist (in the right image) is viewing the patient's skin clearly. |
 |
|
2. Skin image using Request a camera
Please note that the doctor/specialist viewing the remote camera can select High as the Video Quality for their view, using the settings under the shared camera. |
|
|
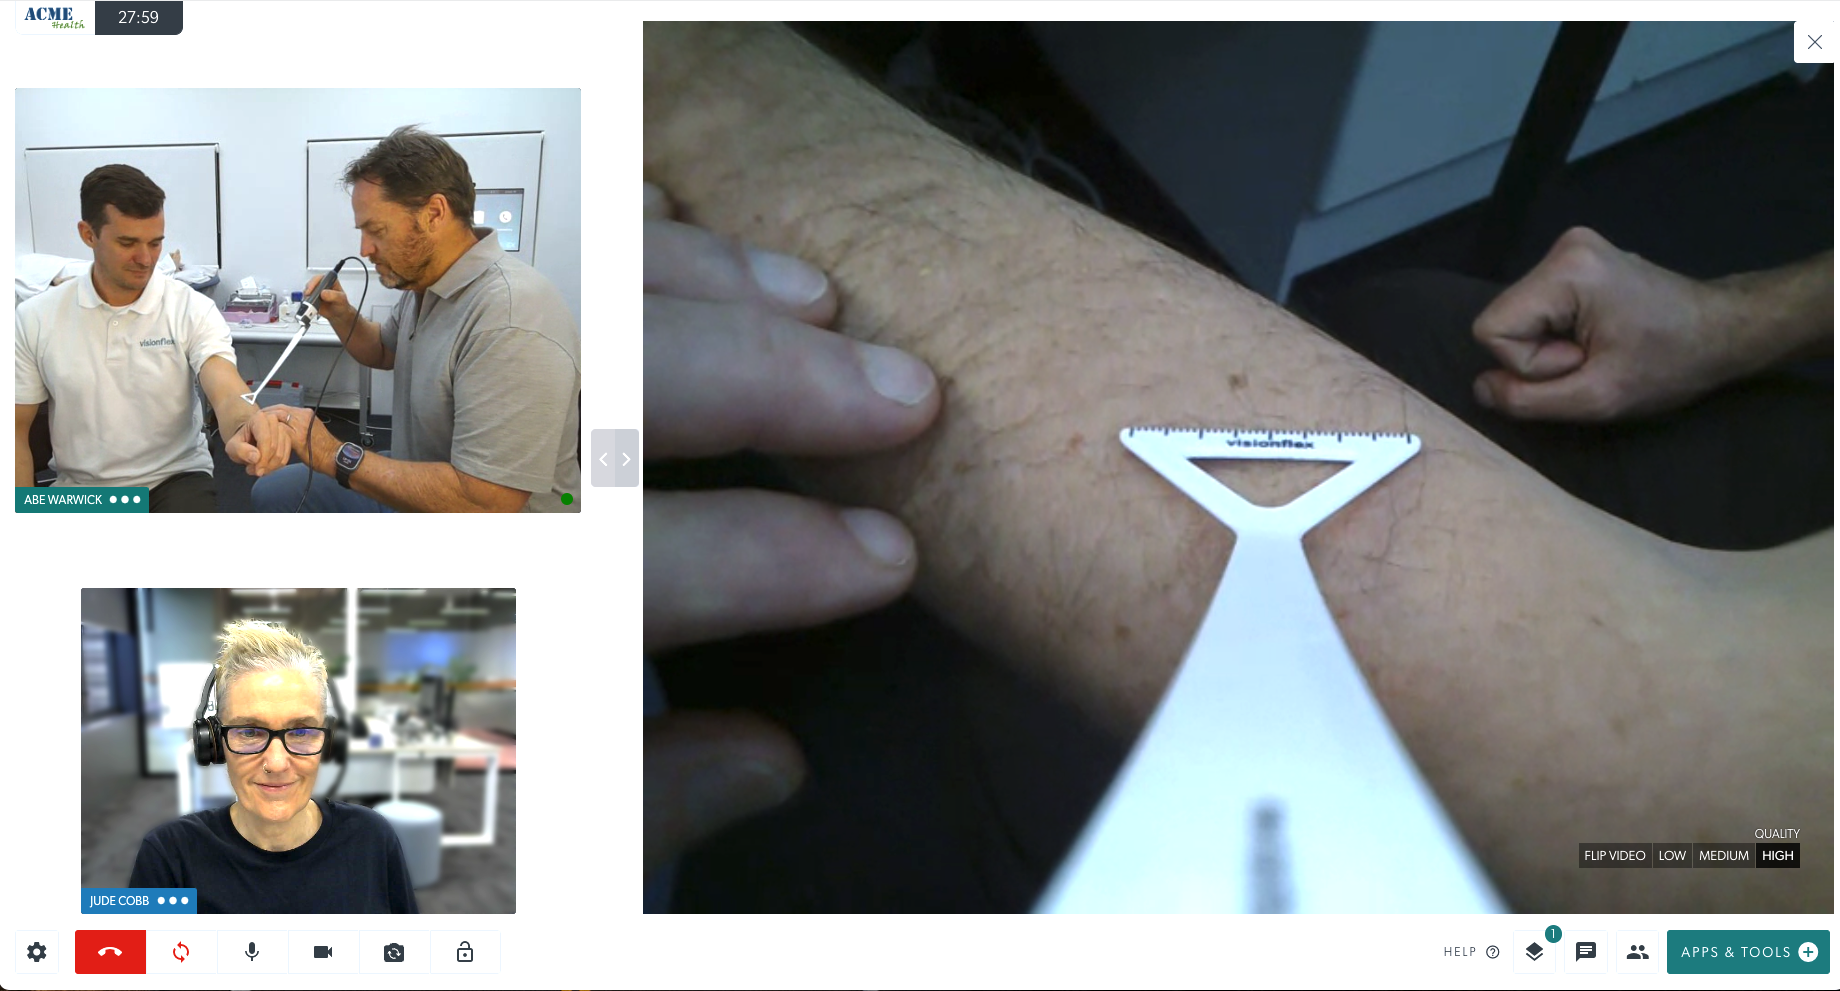
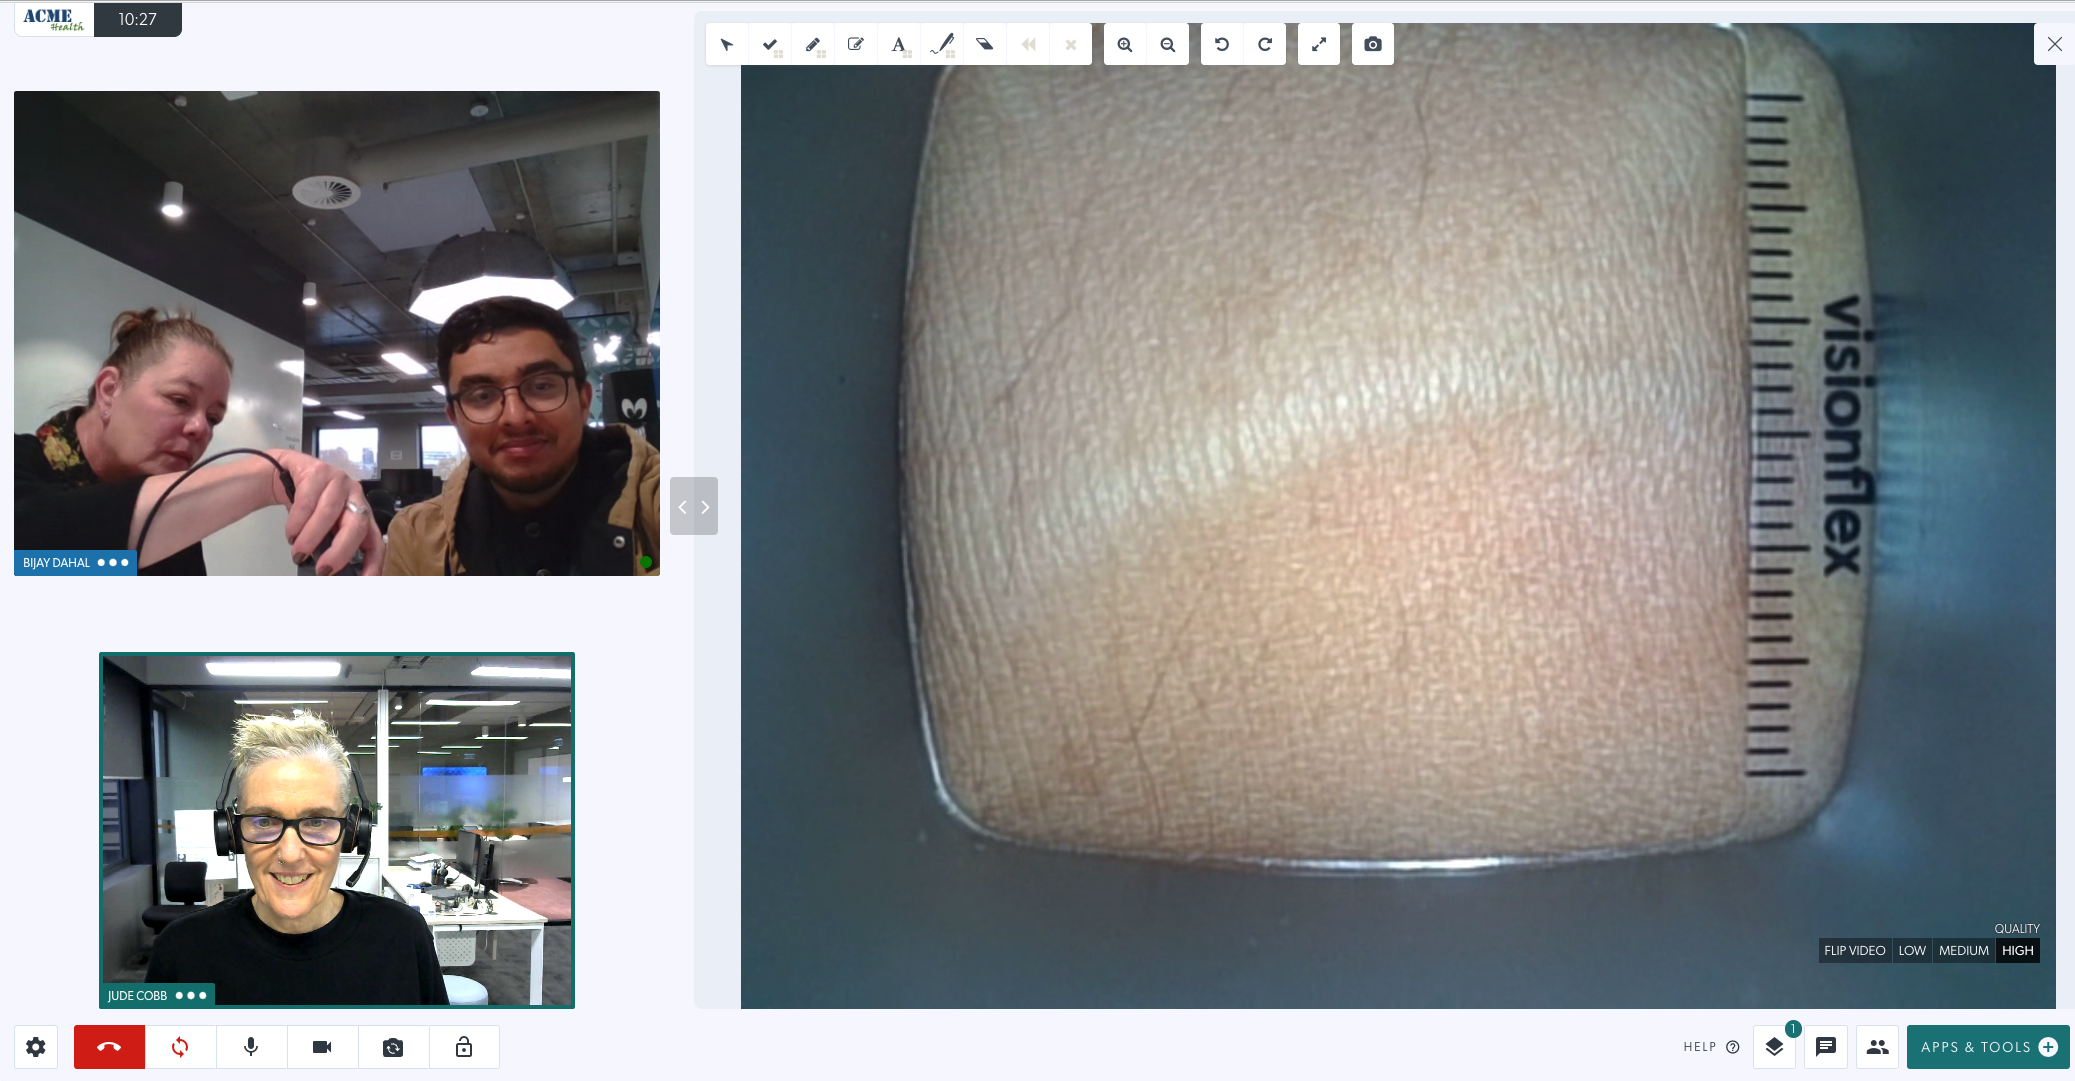
3. Skin examination using a wound measurement stick This optional attachment comes with the device and measures the size of a wound for treatment and comparison. |
 |
|
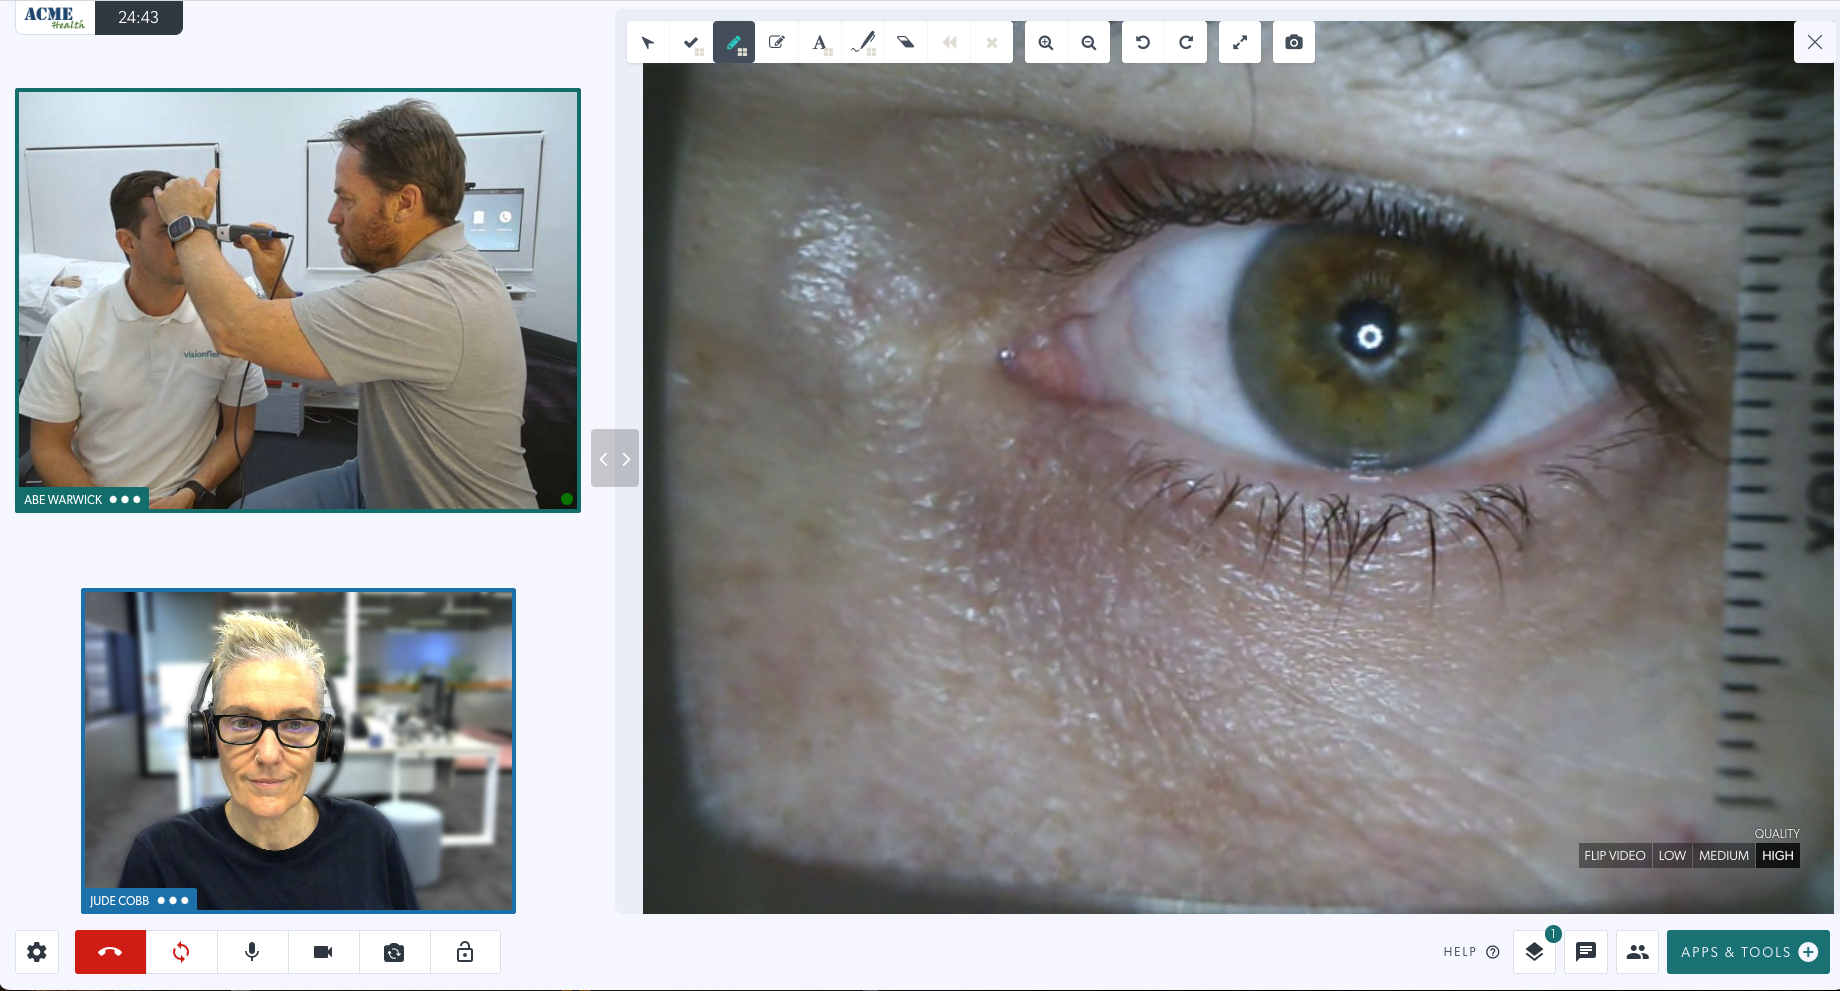
4. Eye examination using request camera In this example, specialist at bottom left has requested a camera. The health service provider with the patient has selected the GEIS camera and the examination has begun. Please note: an accessory has been attached to the hood of the camera, showing distance in millimetres for showing any size changes. |
 |
|
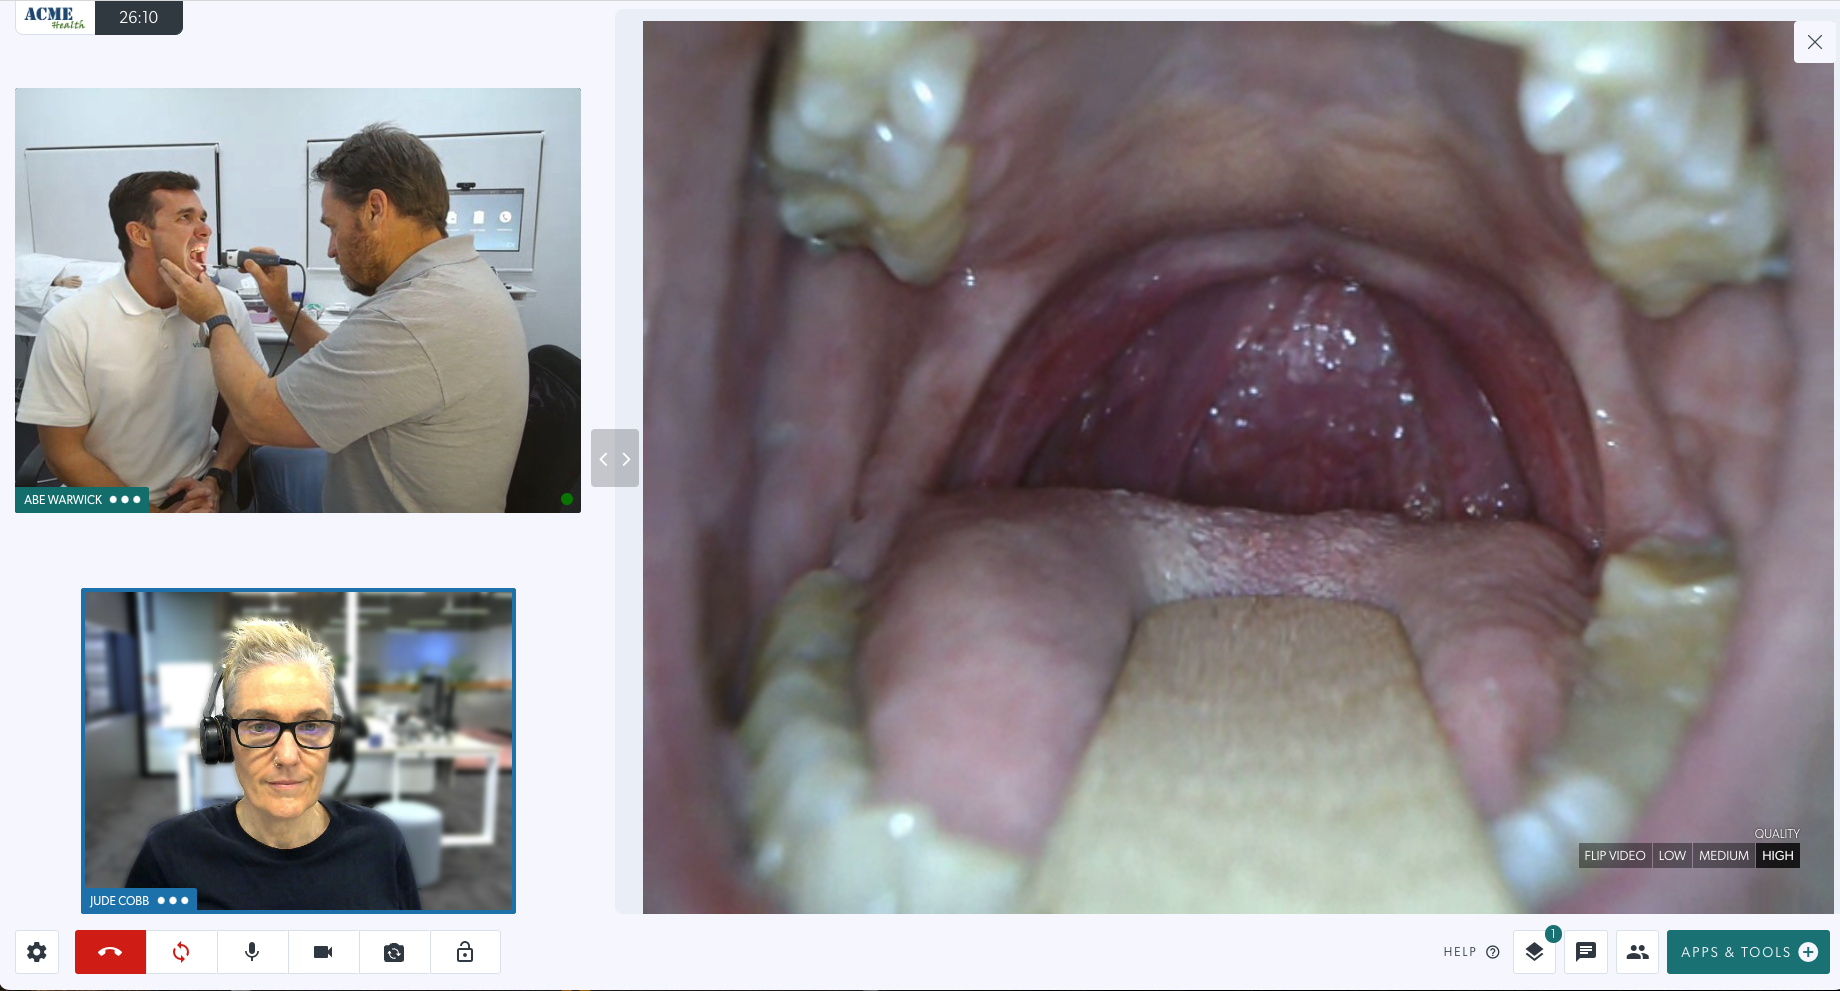
5. Throat examination using request camera This example using the General Examination Camera is showing a throat examination shared into the call. A tongue depressor accessory has been attached to the GEIS camera for this examination. |
 |

Video Examination Glasses HD
The Video Examination Glasses are an excellent way to give a doctor or specialist in another location a view of what the wearer is seeing.
This has many clinical use cases, including a nurse treating a remote patient with the assistance of a remote specialist, for example. This assists with remote diagnosis and live treatment recommendations. The example below shows the Video Glasses shared into the call using the Request a camera feature. Please note, the Video Glasses could also be shared in the call by switching camera.
| The clinician with the patient is shown in the right screen, wearing the Video Glasses. She is preparing to share the glasses camera into the call so the specialist can see what she sees. | 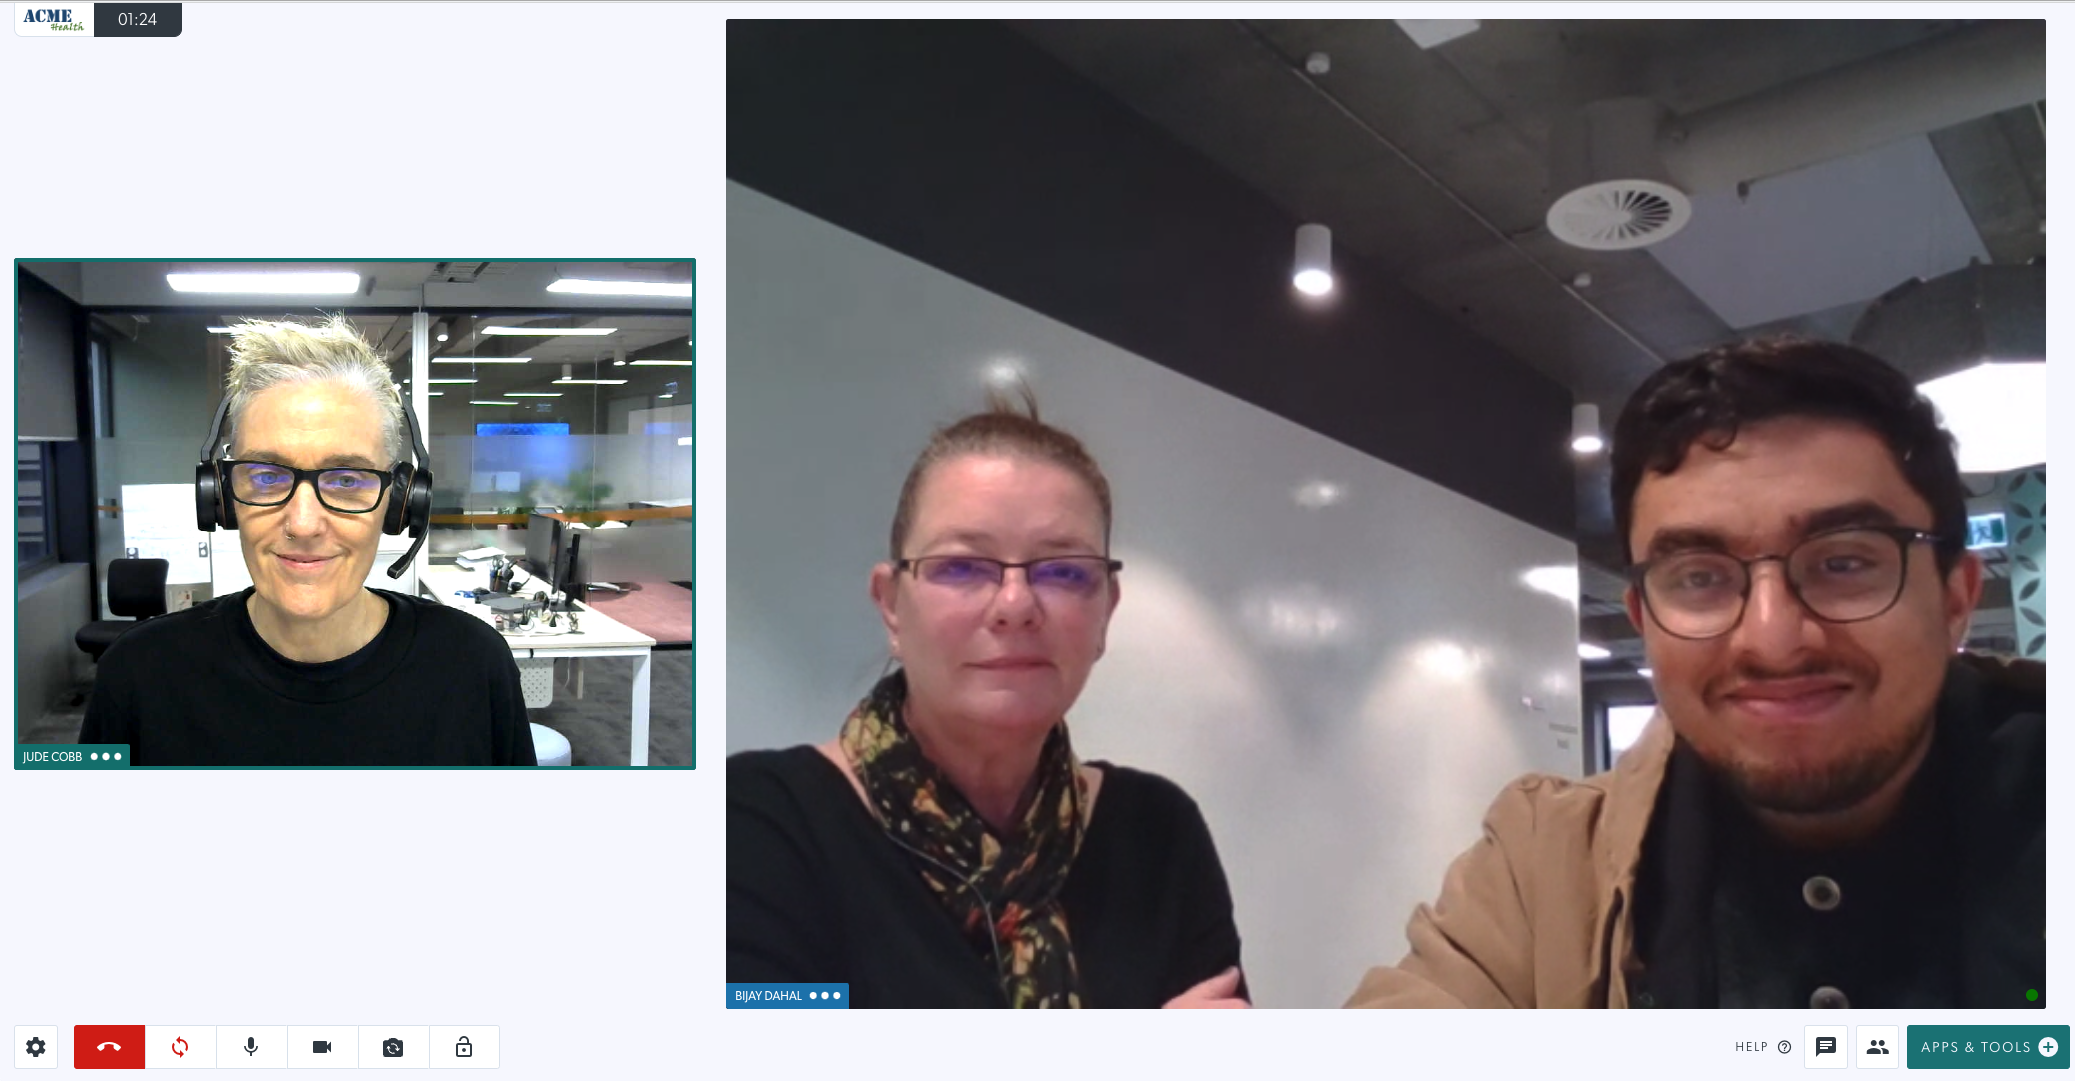 |
| The specialist (shown at the left of the screen) opens Apps & Tools and clicks on Request a camera. |  |
| The health service provider with the patient can select the requested camera in their screen. To do this, click on Select a camera to share. An overlay will appear showing the available cameras. Select the desired camera to share it into the call. |
 |
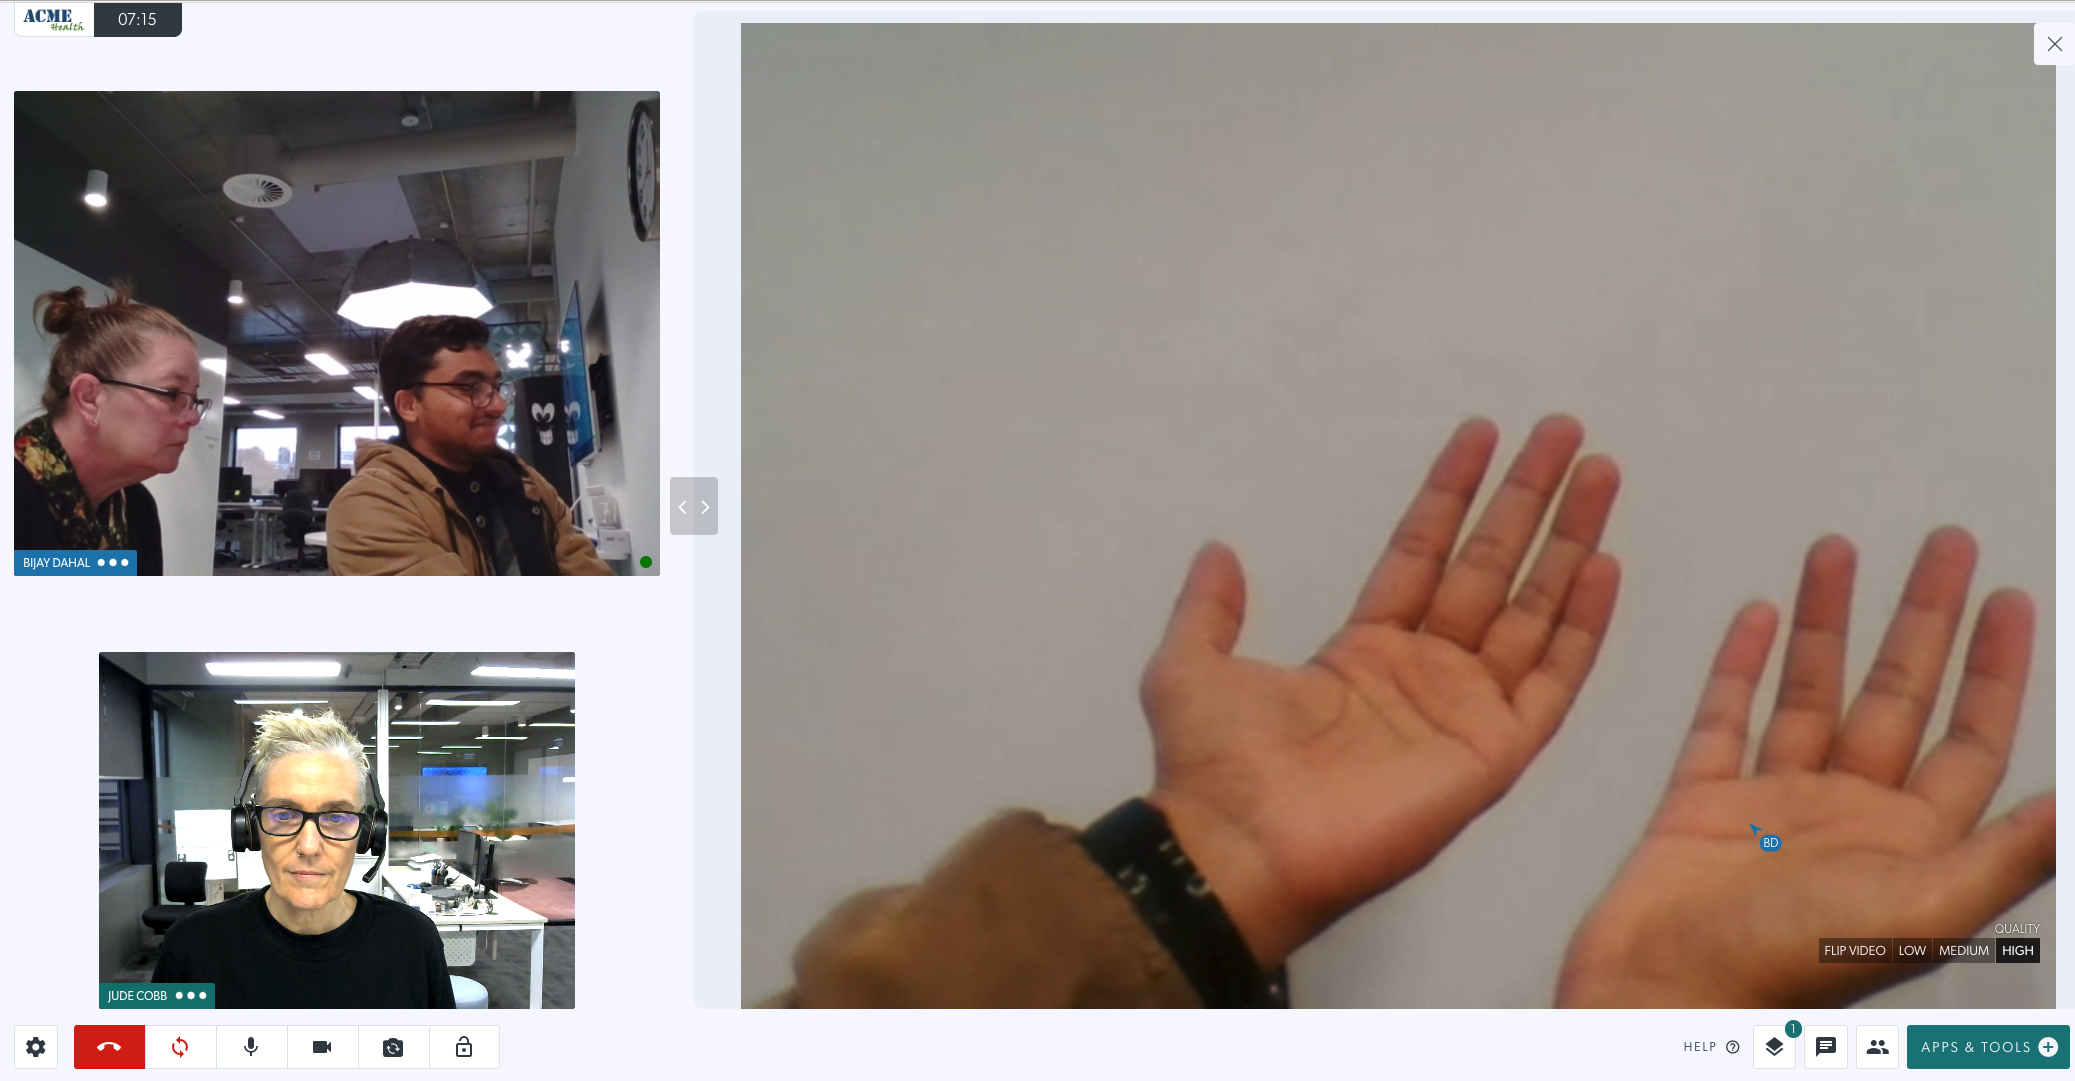
| Here, the Video Glasses camera has been selected and the specialist can see what the wearer sees. In this example the health service provider wearing the glasses is looking at the patient's hands. |
 |
Portable Digital Otoscope
The Portable Digital Otoscope is optimised for inspection of the auricle, the external auditory canal and the eardrum.
| Here, the Portable Digital Otoscope is being used to examine the ear canal during a Video Call consultation. | 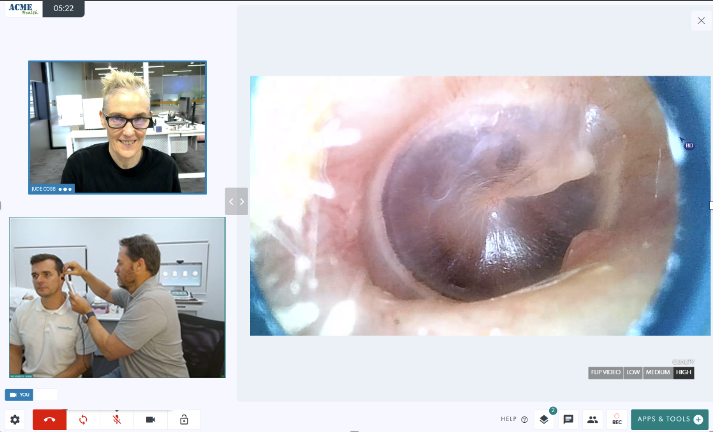 |
Digital stethoscopes - currently being tested and integrated
We are currently working on integrating digital stethoscopes with Video Call. The initial digital stethoscopes being tested for integration are:
| This image shows the Thinklabs digital stethoscope, currently being tested for integration for use with Video Call for real-time remote patient monitoring. |  |
Annotating over and downloading an image from a shared camera
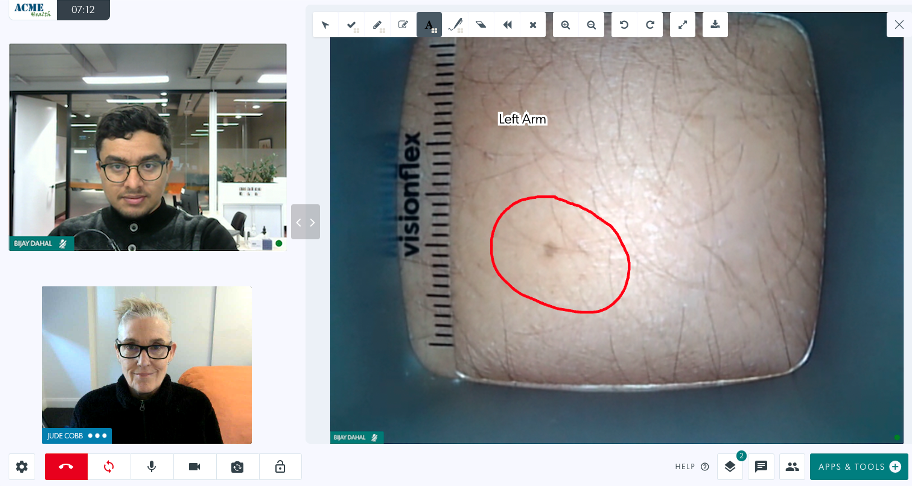
Health service providers can annotate over a shared Visionflex camera using the Resource Toolbar, which displays when you hover over the shared camera window. The shared resource can be downloaded using the download arrow at the right of the Resource Toolbar. Click here and look under Using the Resource Toolbar during a call to find out more information about annotating, downloading and taking a snapshot of a shared resource.
|
Annotation works in the same way as any other shared resource. From the Resource Toolbar, select the desired annotation tool and annotate over the shared Visionflex camera. In this example we have highlighted an area of the skin with a red circle and added some text. All participants in the call will see the annotations.
|
 |
|
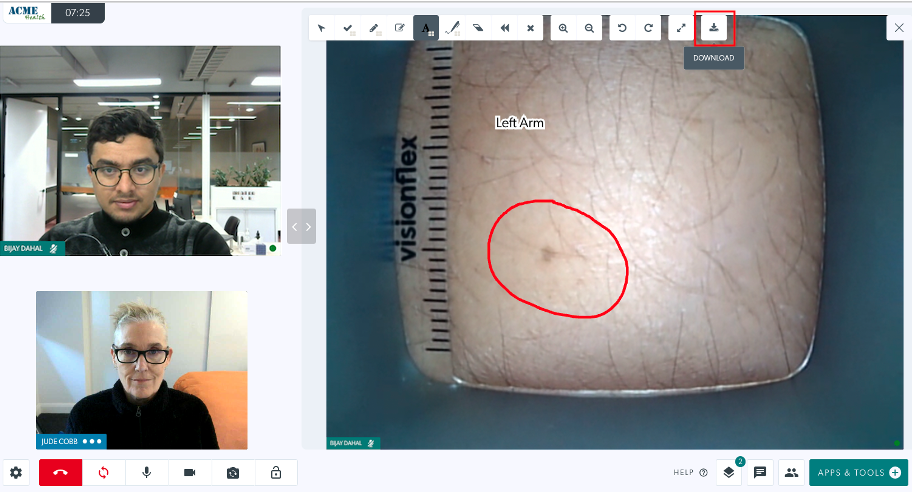
Download an image of the shared camera by clicking on the download button.
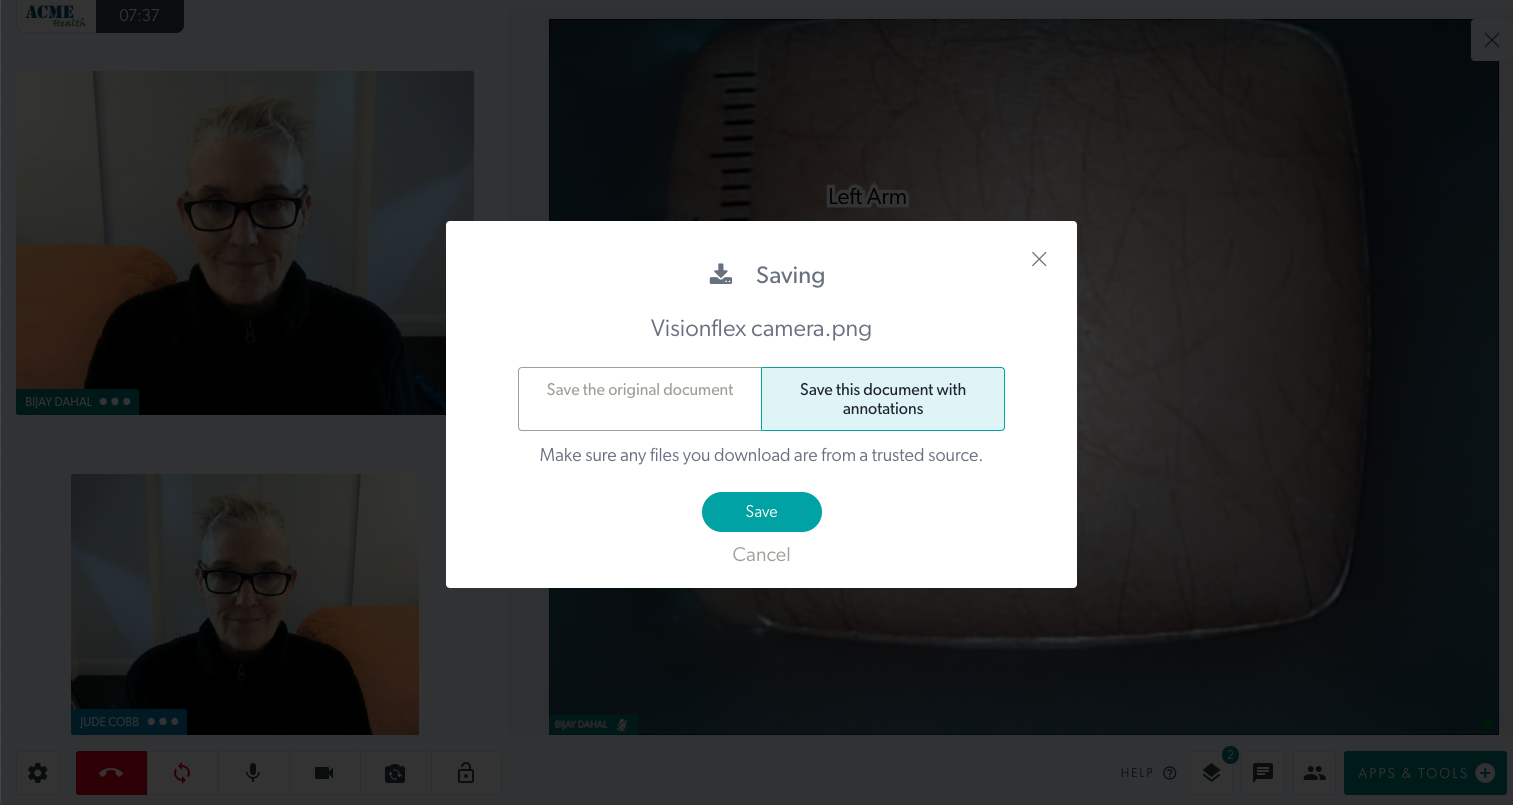
If you have annotated over a resource, you have the option to save the image with or without the annotations, as shown in the bottom image. The downloaded file will save to the folder your downloads are set to.
|
|